


Seeing the DNS_PROBE_FINISHED_NO_INTERNET on Chrome can feel annoying fast. Wi-Fi looks connected, but pages won’t load.
This message usually means the device can’t reach a DNS server, so website names can’t be resolved to the correct IP address. The good news: it’s often a quick fix.
The blog will share quick checks to try right away, then move into easy step-by-step fixes for popular devices and browsers.
We will also cover what to do when the issue keeps coming back, plus a few deeper troubleshooting options for stubborn cases.
By the end, the internet should be back and stable again.
What does DNS_PROBE_FINISHED_NO_INTERNET Mean?
Seeing DNS_PROBE_FINISHED_NO_INTERNET can be confusing because the device may appear connected, yet websites won’t load.
This usually points to a DNS lookup problem, where the browser can’t match a website name to the right online location. It can also be linked to saved network data or adapter issues.
- DNS Failure: The DNS service may not respond, so website names can’t be found.
- Bad Cache: Old saved network details can block loading, even when the connection looks fine.
- Network Adapter Issues: The adapter may glitch, causing unstable access and failed website requests.
Use the steps ahead to narrow the cause and get browsing working again, without stress.
Try These Fixes First (Works for Most Users)
When the DNS probe finishes, no internet shows up. Start with the easiest fixes first. These steps are quick, safe, and often restore the connection with minimal effort.
Work through them in order, and test the internet after each one.
1. Restart Your Router and Modem (2-Minute Fix)
A quick restart can clear small network hiccups and get things running again.
Power Cycle Steps
- Unplug the router and modem from power.
- Wait 30 seconds.
- Plug the modem back in first and wait for it to fully start.
- Plug the router back in and wait 1–2 minutes.
- Try loading a website again.
Why This Helps
This refreshes the connection and clears temporary glitches that can mess with DNS.
2. Flush DNS Cache (Windows & Mac)
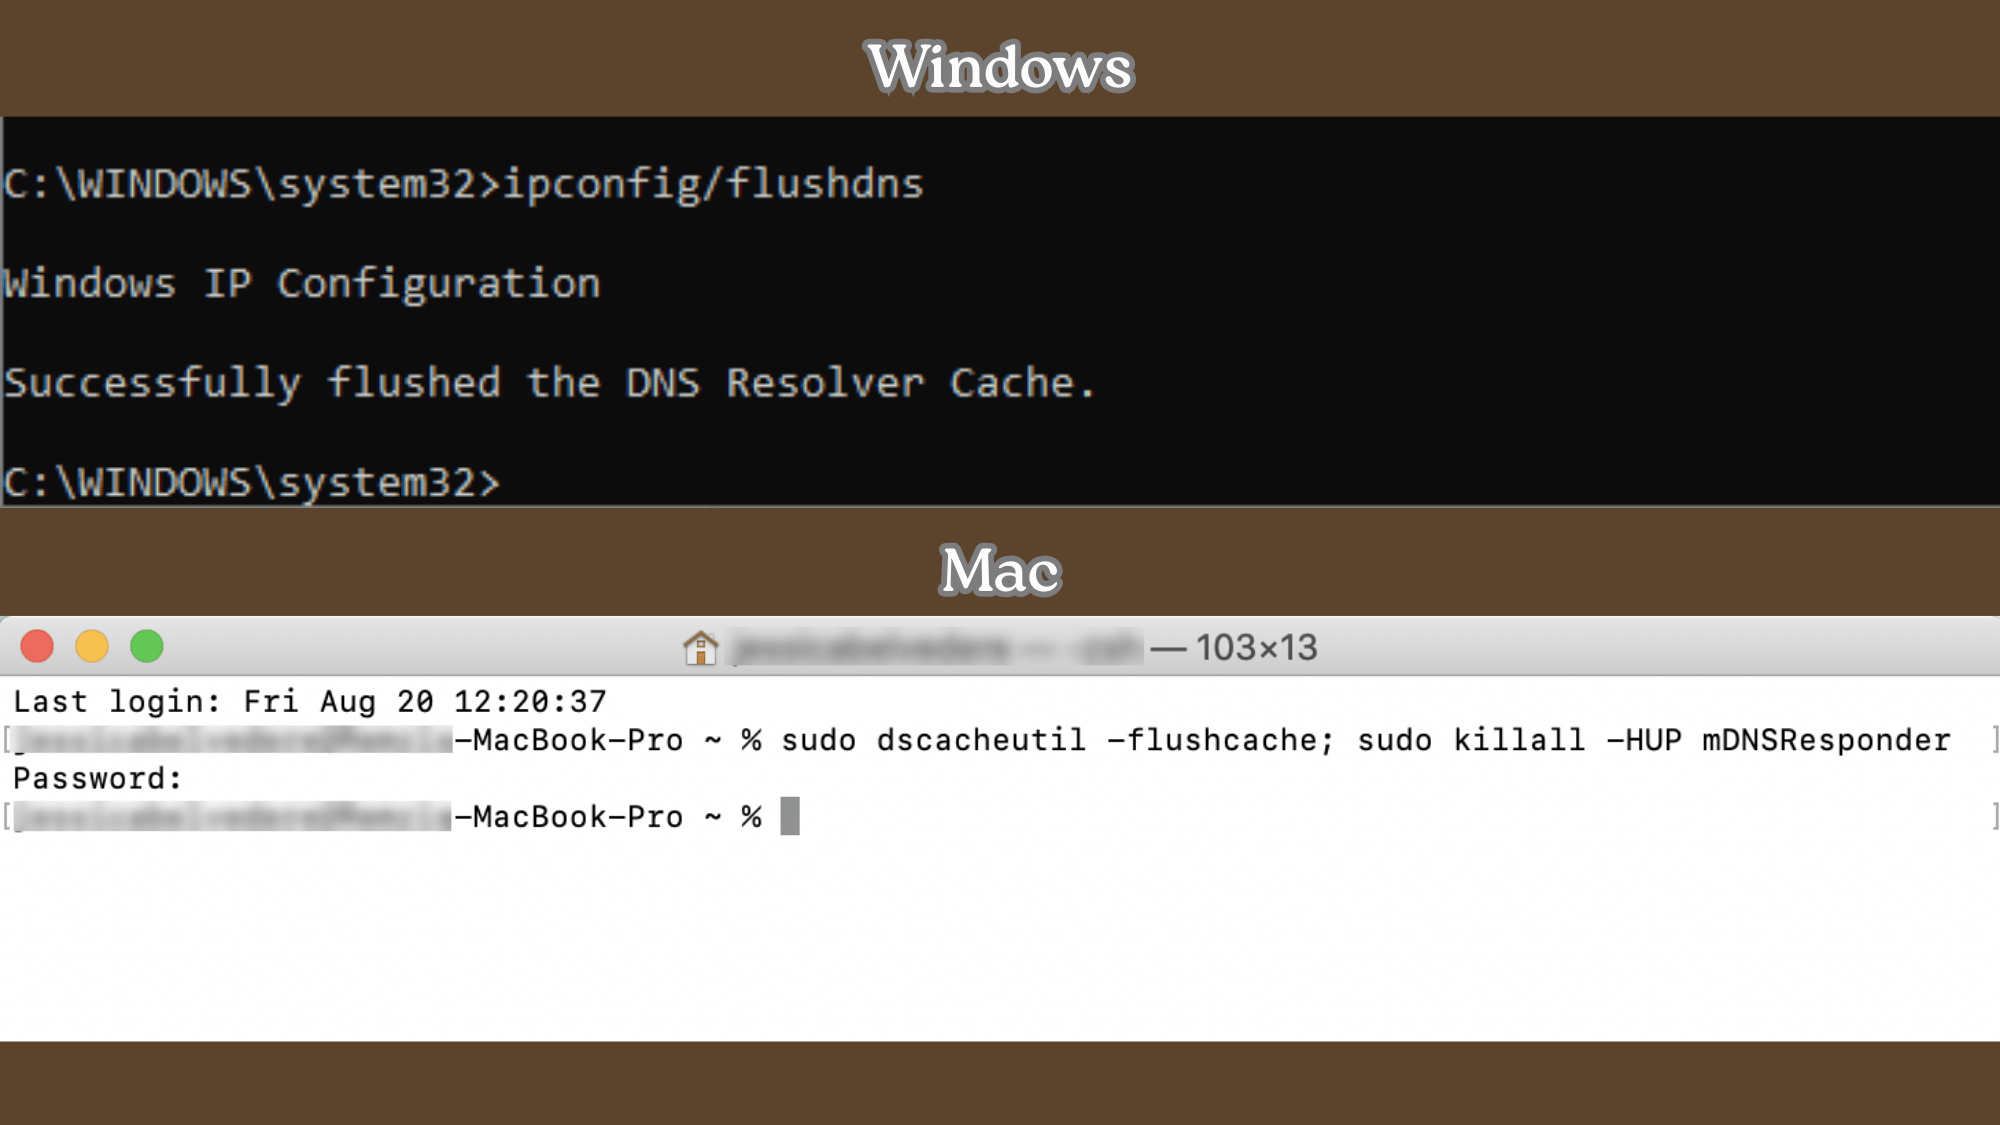
Sometimes the device stores old DNS details. Flushing clears the saved info so the device can try fresh again.
| Device | What to do | Command |
|---|---|---|
| Windows | Open Command Prompt as Administrator | ipconfig /flushdns |
| Windows | Reset network “talk” settings | netsh winsock reset |
| Mac | Open Terminal | sudo dscacheutil -flushcache; sudo killall -HUP mDNSResponder |
What Flushing DNS does
It clears saved DNS records, so the browser stops using outdated or broken lookup details.
3. Change DNS Servers to Public DNS (Google / Cloudflare)
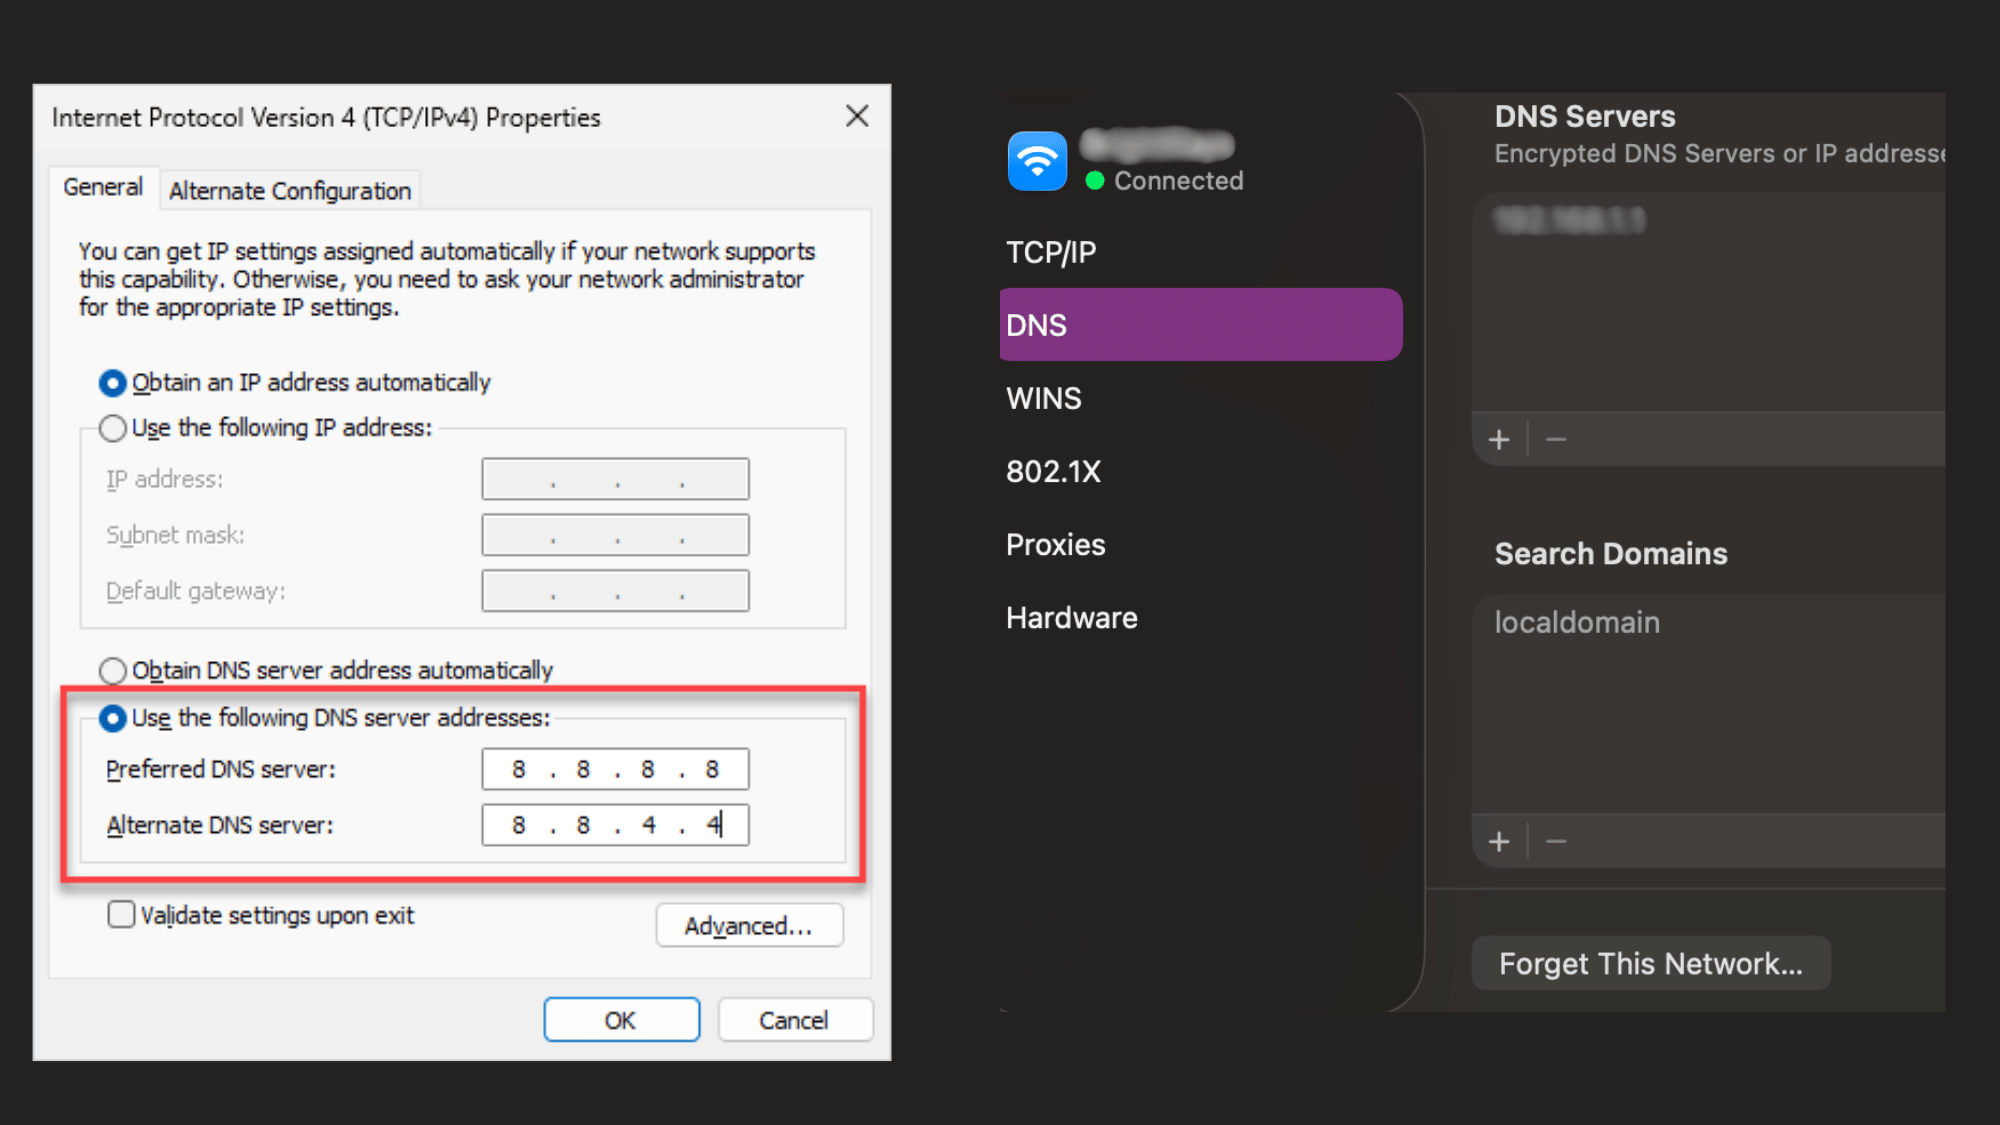
If the current DNS service feels slow or keeps failing, switching to a public DNS can help improve stability and access.
| DNS Provider | Primary DNS | Alternate DNS |
|---|---|---|
| Google Public DNS | 8.8.8.8 | 8.8.4.4 |
| Cloudflare DNS | 1.1.1.1 | 1.0.0.1 |
Steps to Change DNS on Windows
- Open Settings and go to Network & Internet.
- Select Wi-Fi or Ethernet, then click the active network.
- Choose Edit under IP settings and switch to Manual.
- Enable IPv4 and enter the DNS addresses above.
- Save changes and reconnect to the network.
Steps to Change DNS on Mac
- Open System Settings and select Network.
- Choose the active connection and click Details.
- Go to DNS and add the new DNS addresses using the plus (+) button.
- Click OK, then Apply, and reconnect.
Why Can This Fix the Issue
- ISP DNS servers may slow down or fail during heavy traffic times.
- Public DNS services are often faster and more stable for daily browsing.
4. Disable VPN, Antivirus, or Firewall (Temporarily)

Some tools can block web requests or reroute traffic in a way that breaks DNS.
Try this quick check
- Turn off VPN first, then test a website.
- If needed, pause the antivirus/firewall briefly and test again.
- Turn protection back on after testing.
Why this can help
- VPNs can add delay, which can make DNS lookups fail.
- Security tools may block DNS requests if they flag something by mistake.
If the issue persists after these steps, follow the next steps, which provide deeper fixes for stubborn problems.
Step-by-Step Fixes by Device & OS
If the quick fixes didn’t solve DNS probe finished no internet, these steps go a little deeper. Pick the device and system being used, follow the steps in order, and test the internet after each fix.
5. Fix DNS Probe Finished No Internet on Windows
These Windows fixes target common network and DNS problems.
Step-by-step (Windows)
- Open Start, type cmd.
- Right-click Command Prompt → choose Run as administrator.
- Run these commands one by one (press Enter after each):
ipconfig /flushdnsnetsh winsock resetipconfig /releaseipconfig /renew- Restart the computer and test a website.
Update Network Adapter Drivers (Windows)
- Open Device Manager.
- Expand Network adapters.
- Right-click the main Wi-Fi/Ethernet adapter → Update driver.
- If the problem keeps returning, choose Uninstall device, then restart to reinstall automatically.
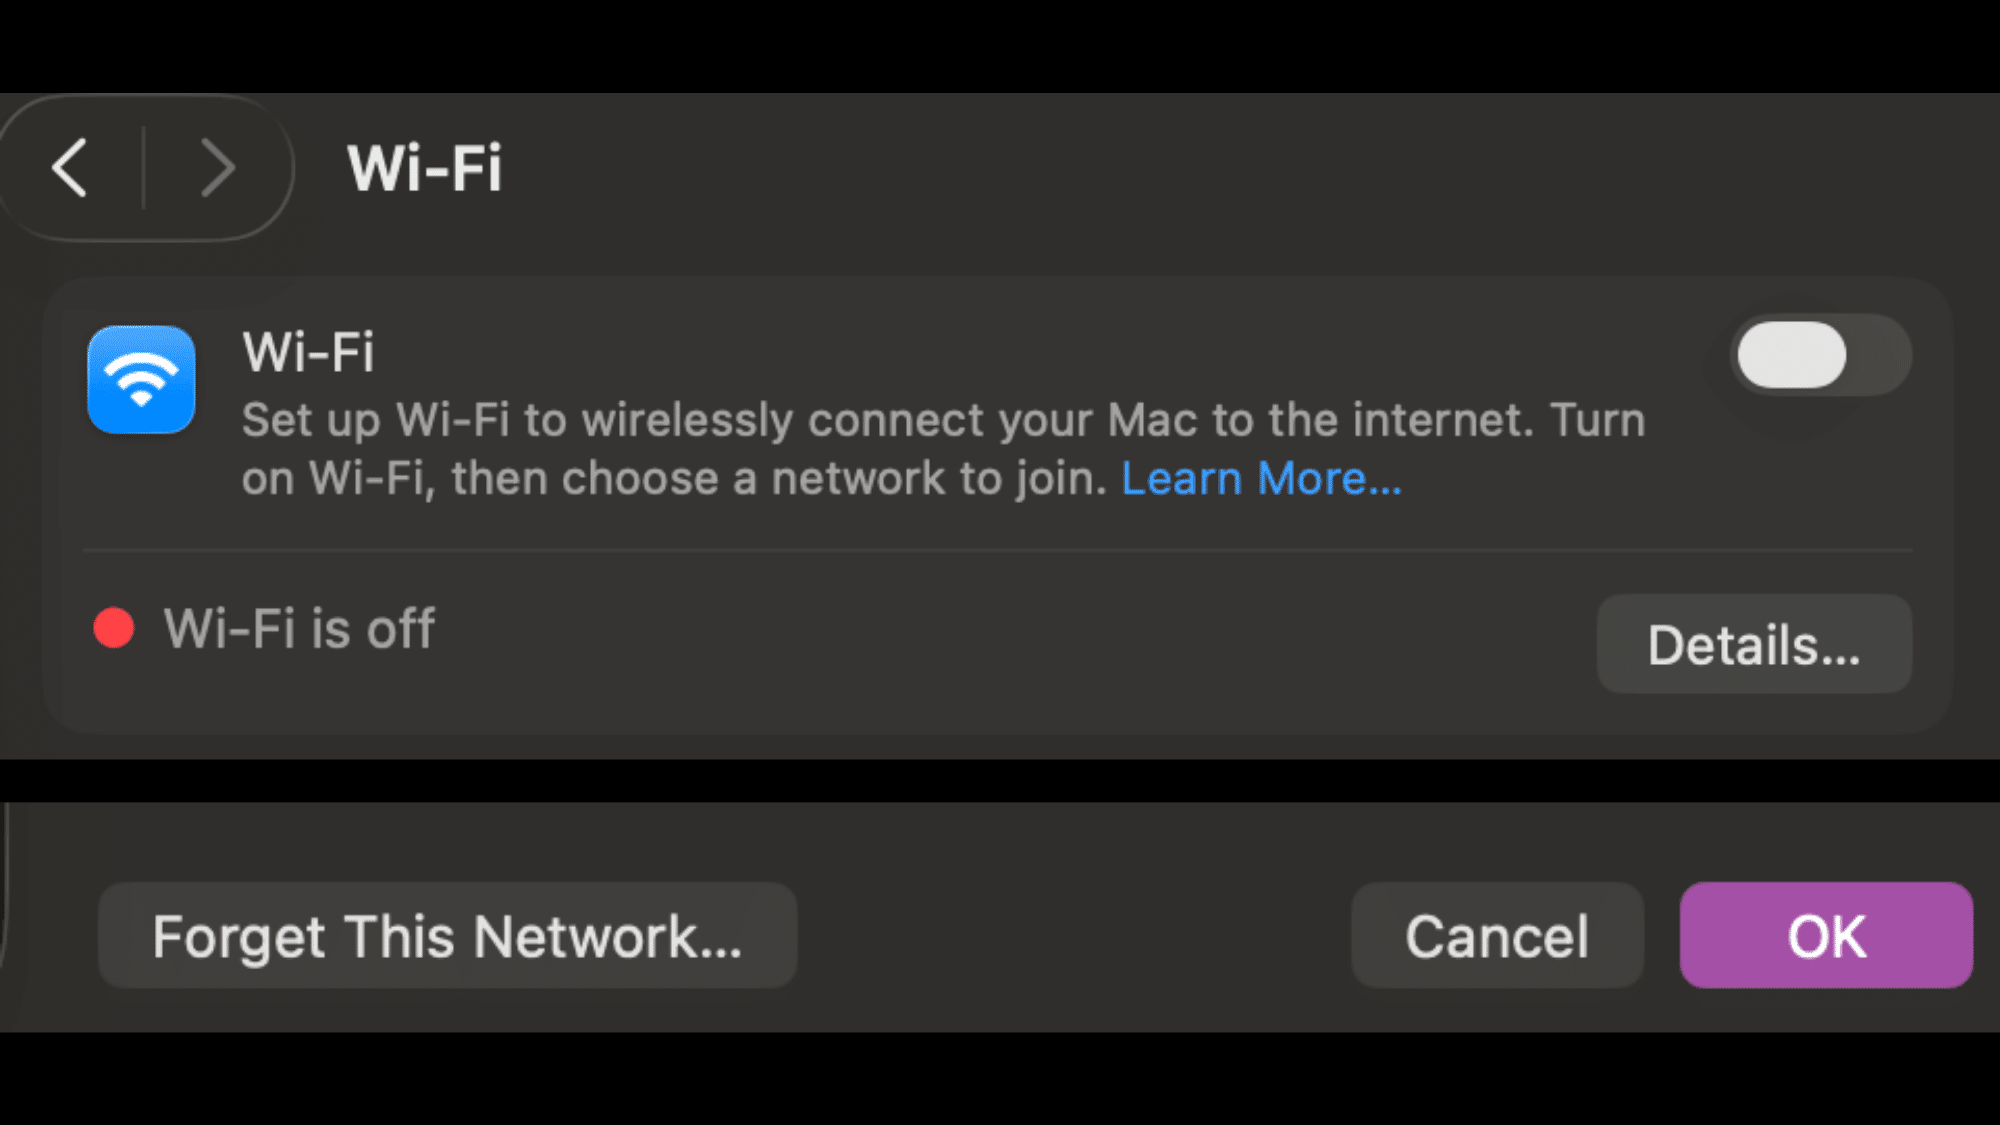
6. Fix DNS Probe Finished No Internet on Mac
These steps focus on refreshing the network connection.
Refresh Wi-Fi (Mac)
- Turn Wi-Fi off, wait 10 seconds, then turn it back on.
- Forget the Wi-Fi network and reconnect using the password.
Remove and Re-add Network Service (Mac)
- Open System Settings → Network.
- Select the active connection and remove it.
- Add it again, reconnect, and test a website.
7. Fix DNS Probe Finished No Internet on Chrome
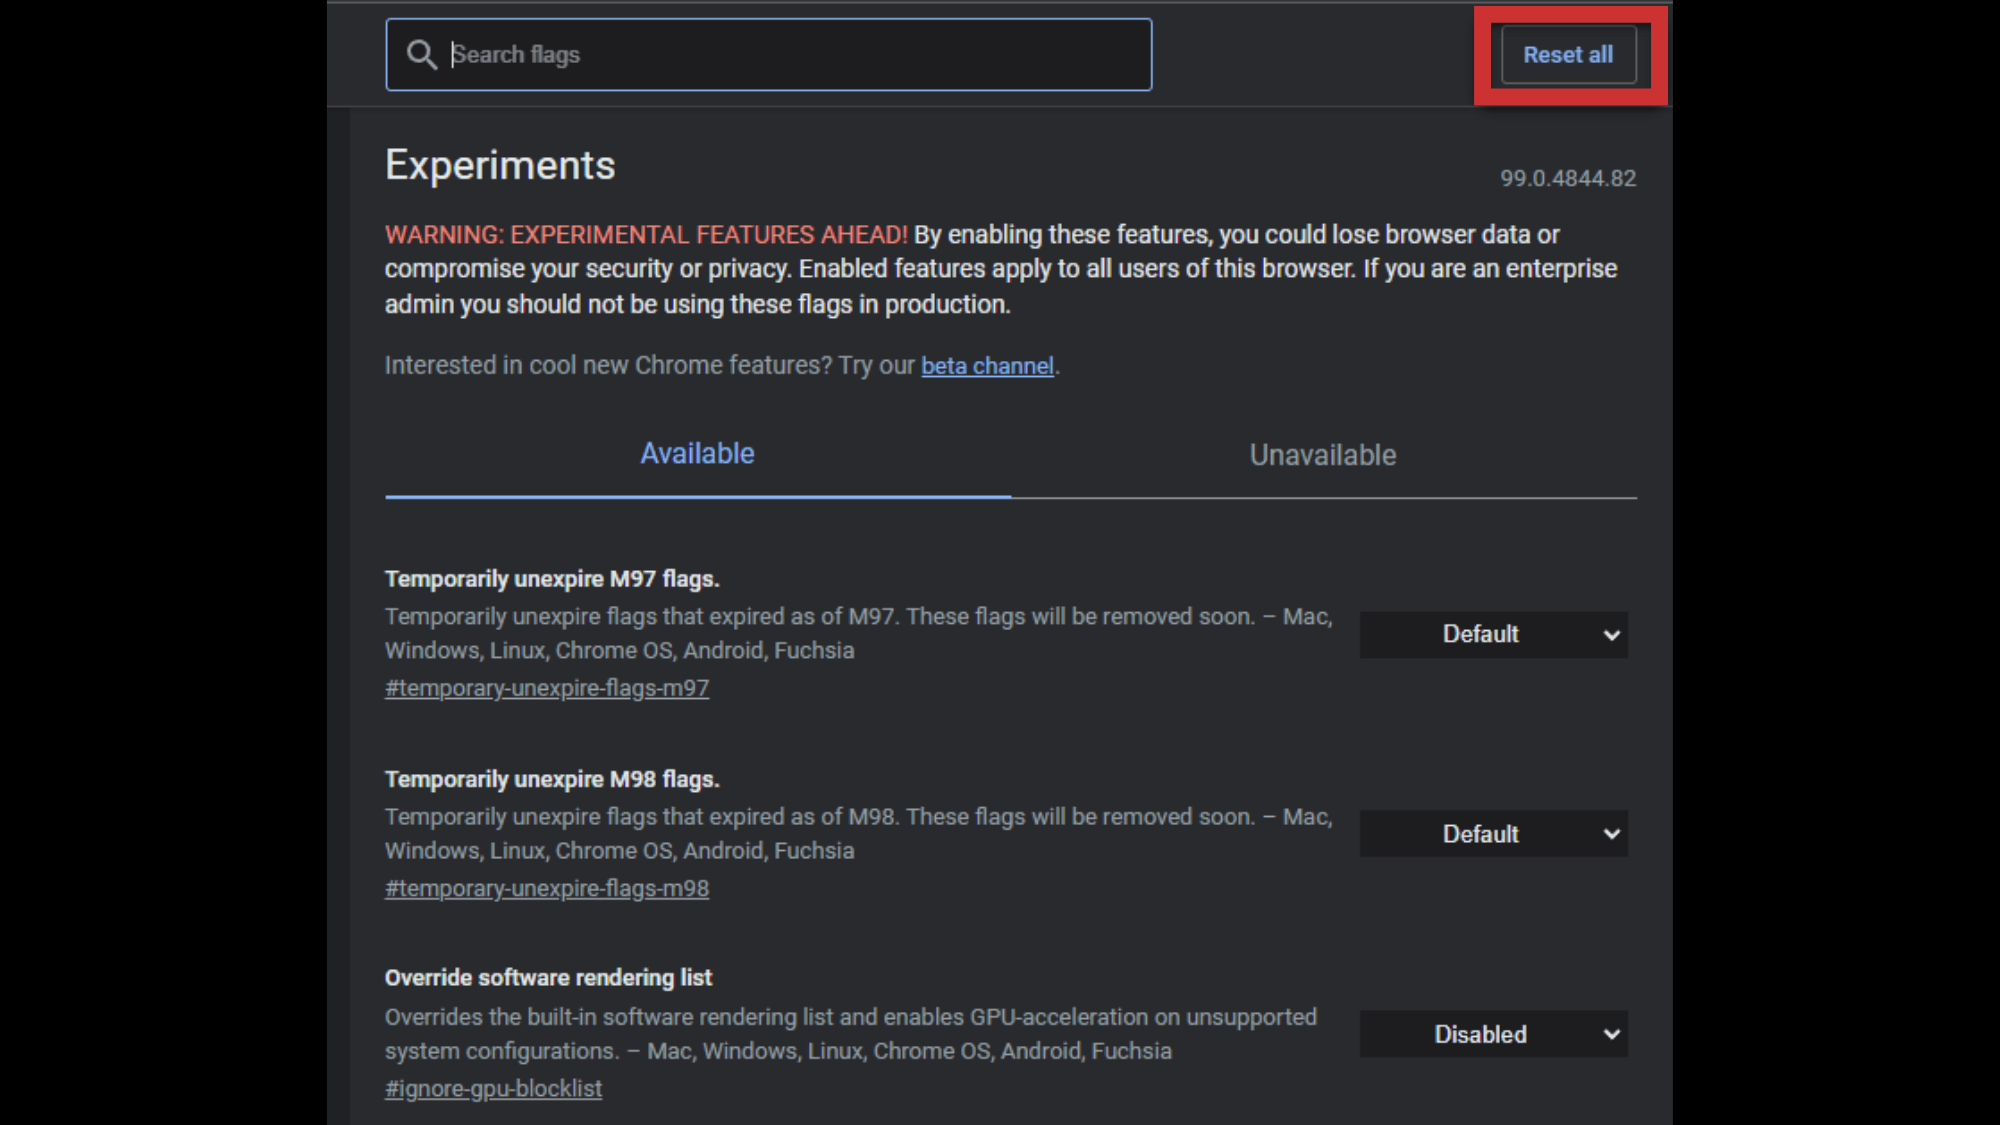
Sometimes the internet works, but Chrome is the one acting up. These steps reset Chrome’s network behavior and clear stuck data.
Step-by-step
- Open Chrome and go to:
chrome://flags - Click Reset all → click Relaunch.
If pages still won’t load:
Go to Chrome Settings → Reset settings → Restore Defaults.
Clear cache:
Settings → Privacy and security → Clear browsing data → Clearcached images and files.
How to Know If the Problem Is Your ISP or the Website
Sometimes the problem might not be with your device; it might be the ISP or the website itself. Here’s how you can check whose problem it is:
| What to check | How to do it (simple steps) | What the result usually means |
|---|---|---|
| Test the internet on another device | Connect a phone or another laptop to the same Wi-Fi and open any site. | If other devices work, the problem is likely with one device. |
| Try different websites | Open 3–5 sites (a search engine, a video site, a news site, etc.). | If only one site fails, that website may be having an issue. |
| Use a mobile hotspot test | Turn on the phone hotspot, connect the device, then open the same websites again. | If the hotspot works, the home internet or ISP DNS may be the problem. |
| Check the signs that the ISP DNS is down | Pages won’t load on many devices, but Wi-Fi shows connected. Hotspot works. | This often points to an ISP-side DNS problem or a local ISP outage. |
| Try a DNS switch (quick proof) | Change DNS to Google (8.8.8.8) or Cloudflare (1.1.1.1), then test again. | If it starts working, the ISP DNS was likely the trouble spot. |
| Contact the ISP at the right time | Ask if there’s an outage or DNS issue in the area, and share the hotspot result. | This helps support teams narrow the cause faster. |
How to Run a DNS Propagation Test
A DNS propagation test helps check whether a website’s DNS changes have fully spread across the internet. This step is useful when a site works for some people but not for others.
Below are simple ways to test it using common tools.
Method 1: nslookup (Windows)
This method works on most Windows computers.
- Open Start and search for Command Prompt.
- Open it and type:
nslookup website url - Press Enter and review the results.
If the response looks different each time or fails, DNS may still be updating.
Method 2: dig Command (Mac / Linux)
This method is common on Mac and Linux systems.
- Open Terminal.
- Type:
dig website url - Press Enter and wait for the results.
If no clear answer appears, DNS updates may not be complete yet.
Method 3: Online DNS Lookup Tools
Online tools make this test easy without commands.
- Open a trusted DNS lookup website.
- Enter the website name.
- View results from different locations.
If results vary by location, DNS propagation is likely still in progress.
Final Thoughts
Getting past DNS_PROBE_FINISHED_NO_INTERNET is mostly about trying the right fix in the right order. Once the router, DNS settings, and device network tools are checked, the connection usually comes back and stays steady.
If the problem shows up again, it helps to note when it happens, which device it affects, and whether a hotspot works.
That makes it easier to tell if the issue is the device, the router, the ISP, or one specific website. For website owners, running a quick DNS check can also point to record or update delays.
Want more simple troubleshooting guides like this? Bookmark this page and share the steps with someone who’s stuck offline.