


Fast and reliable internet makes a big difference in daily life, especially if you work from home, stream videos, or live in an area with limited internet options.
Many people feel unsure about setting up satellite internet, but Starlink installation is easier when you follow the right steps.
This blog shares how to do Starlink installation easily at home with clear setup steps, helpful mounting advice, equipment tips, and easy fixes for common connection problems.
I also share tips to help you avoid setup mistakes, improve signal strength, and get Starlink working smoothly.
For those who also use satellite phones while traveling to remote areas, checking satellite phone laws for travelers before you pack your devices can save you from serious trouble at customs.
These tips can save time during setup and help you get your Starlink internet running without delays.
Why More Homeowners Are Choosing Starlink Internet?
More homeowners are choosing Starlink Internet because it offers faster, more reliable internet access in areas where traditional services often fail.
This satellite internet system has become a practical option for rural homes, remote properties, and places with weak cable or fiber coverage.
Many users also prefer it for streaming, gaming, online classes, and remote work. Those who need communication beyond internet access often pair it with the best satellite communication devices for full off-grid connectivity.
Another reason for its popularity is the simpler setup process compared to many traditional internet connections.
With proper dish placement and a clear view of the sky, many homes can get connected without major construction or complicated wiring.
It also works well for homeowners who want internet access in cabins, farms, RVs, and other locations where installing wired connections is difficult.
Tools and Equipment Needed Before Installing Starlink
Before starting the installation, it is important to check the setup area and gather the basic equipment needed for a smooth process. Having the right tools ready can help reduce setup time and avoid common installation problems.
- Starlink dish
- Router
- Mounting stand
- Power cable and Ethernet cable
- Drill machine
- Screwdriver
- Ladder
- Cable clips
- Measuring tape
How to Set up a Starlink Dish at Home?
Installing Starlink at home is a simple process when the dish is placed in a clear location, and the setup steps are followed correctly. Proper alignment and cable setup can also help improve internet speed and connection stability.
Step 1: Open the Starlink Box and Check the Equipment
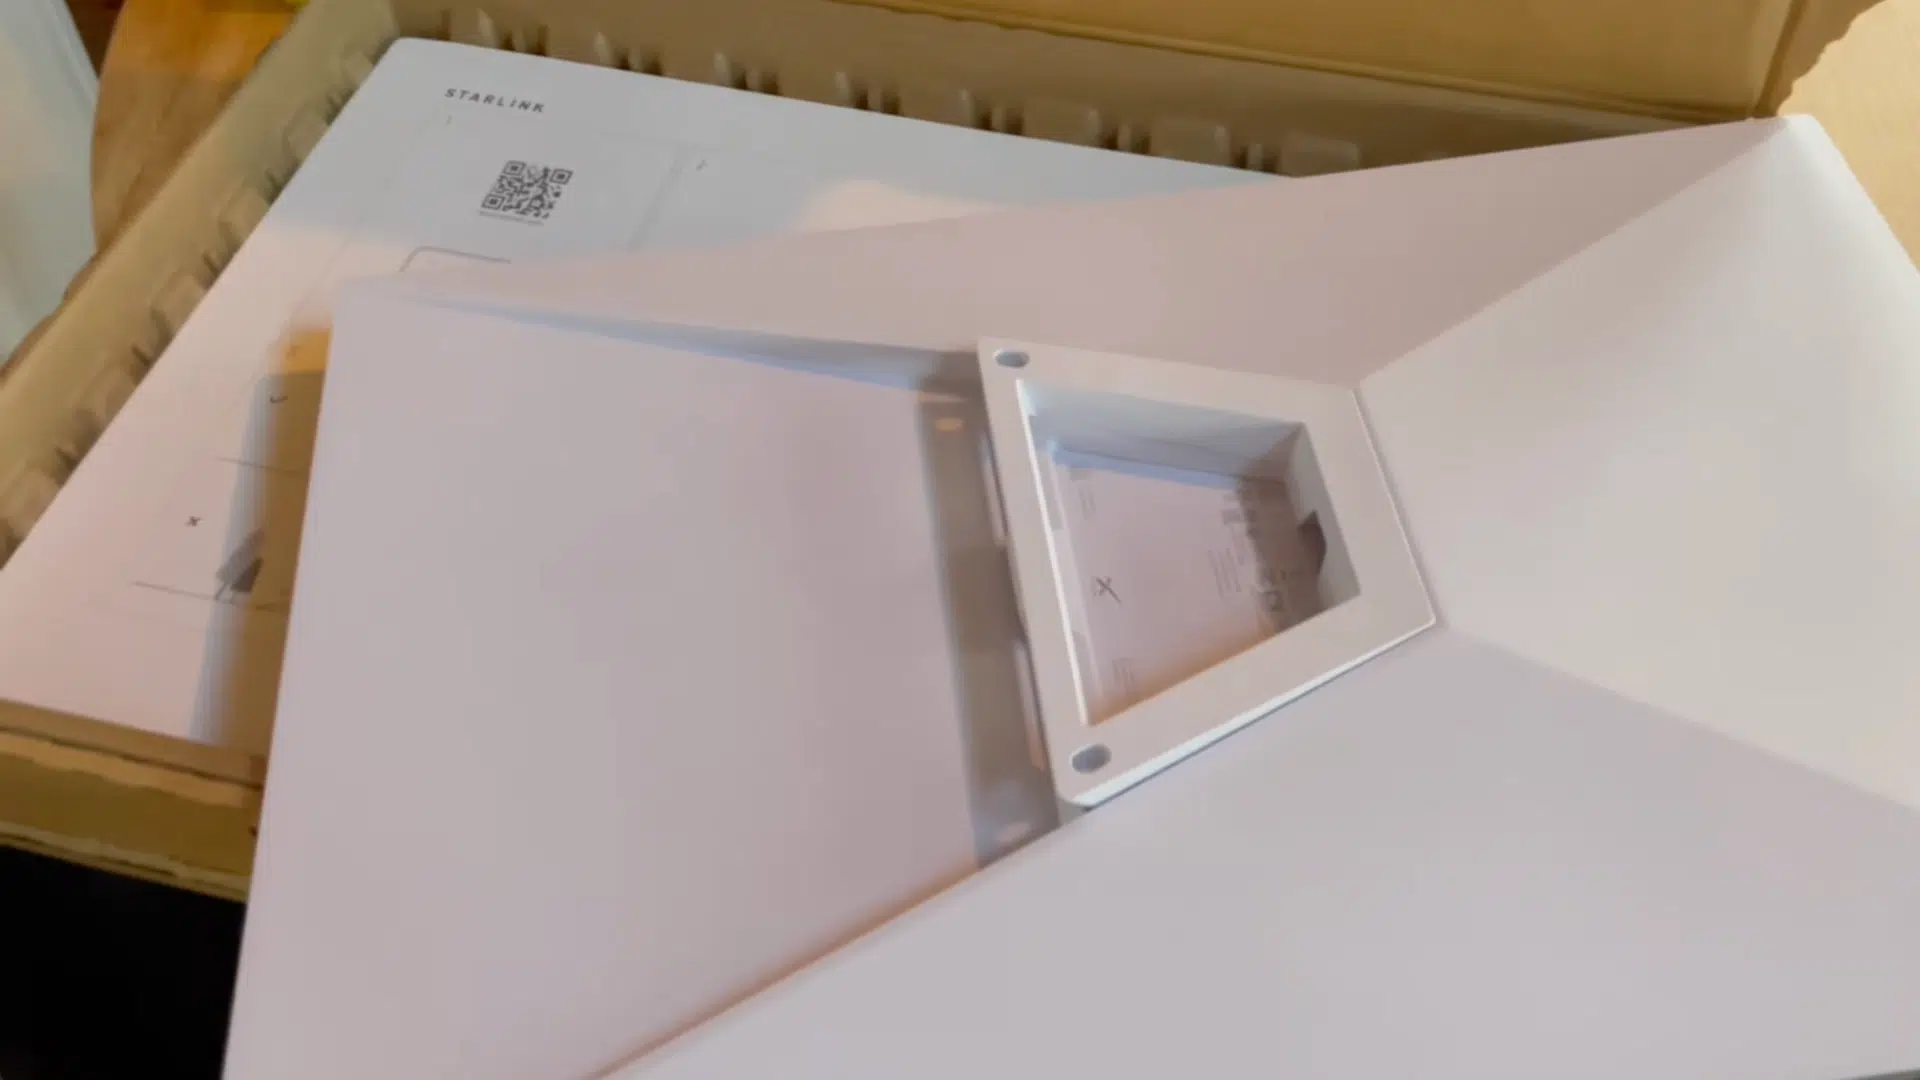
The setup process starts by unpacking the Starlink kit and carefully checking all the included parts. The package normally includes the Starlink dish, kickstand, router, cables, and power adapter.
The dish is larger than many people expect, but the overall setup design is simple and beginner-friendly.
Checking the equipment before installation helps prevent delays caused by missing parts or damaged cables. It is also helpful to place all components in one area before moving outside for the main installation process.
Step 2: Download the Starlink App
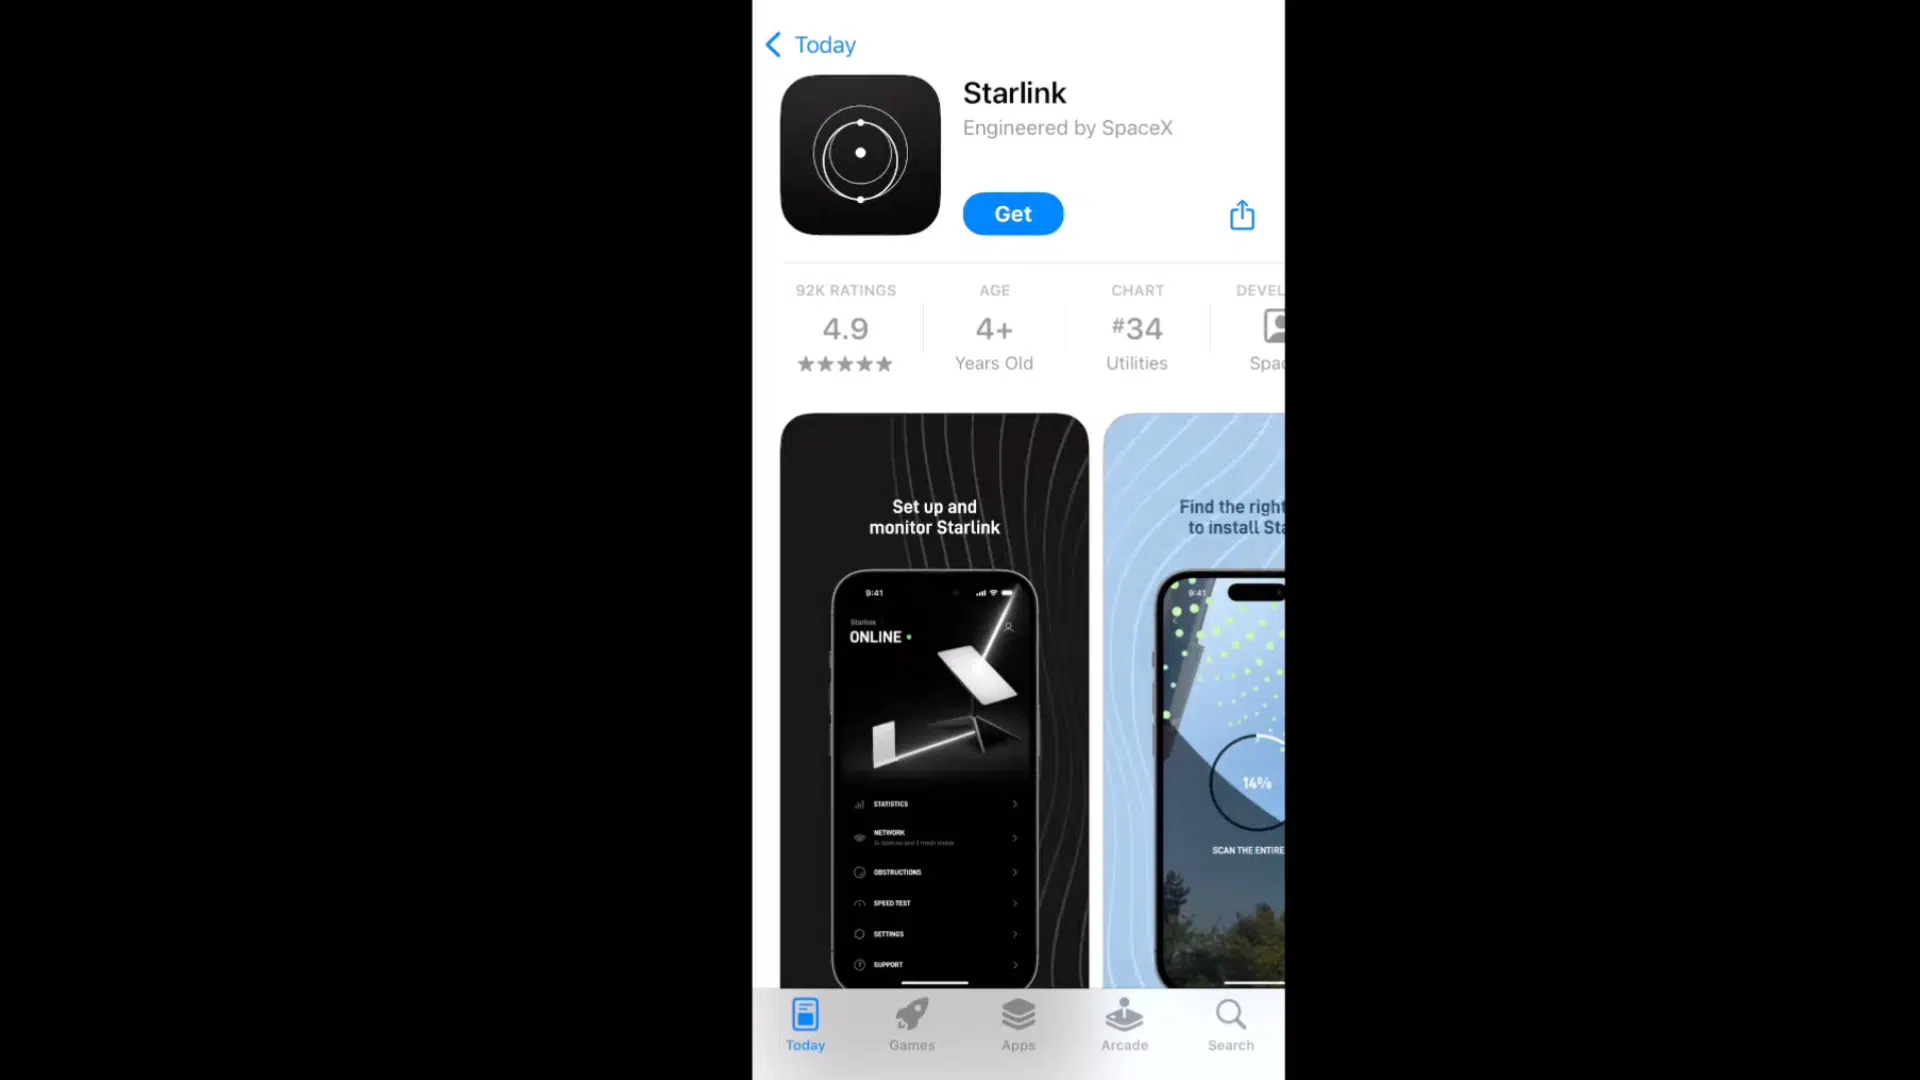
The Starlink app plays an important role during installation by helping manage setup, alignment, and network connectivity.
The app can be downloaded from the Apple App Store or Google Play Store before starting the setup process.
In remote areas with weak mobile signals, downloading the app ahead of time can save a lot of waiting later.
The app also provides useful setup instructions, obstruction checks, and connection updates, making the installation process easier and more organized from the beginning.
Step 3: Find a Clear Outdoor Location

A clear outdoor location is important for proper Starlink performance because the dish needs an open view of the sky to connect with satellites.
Areas surrounded by tall trees, roofs, or nearby buildings can block signals and reduce internet quality. An open yard or rooftop area usually works best during the first setup.
Temporary placement can also help test signal strength before choosing a permanent mounting location.
Good placement reduces connection interruptions and improves internet speed and reliability during everyday use.
Step 4: Connect the Power Supply and Router
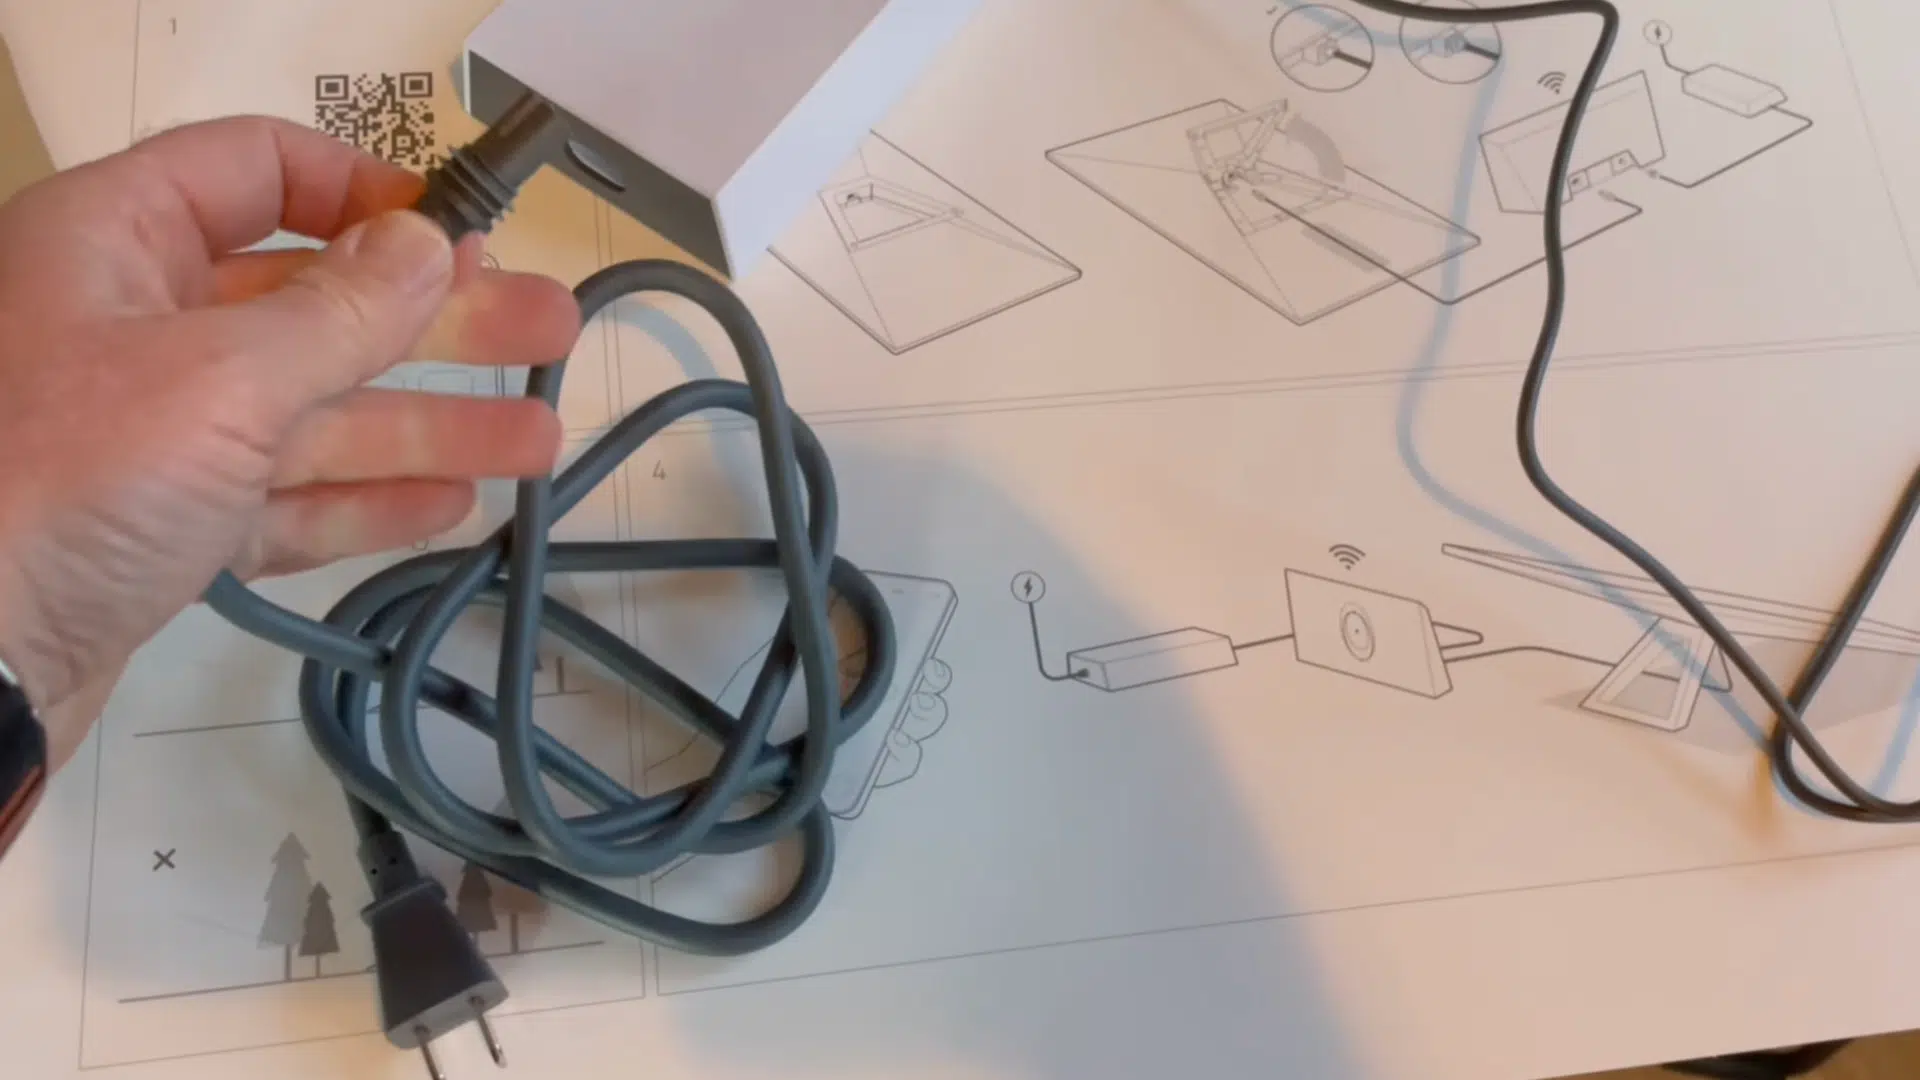
After choosing the setup location, the next step is connecting the Starlink equipment correctly. The power cord connects to the power adapter first, while the adapter links to the router.
A long network cable then connects the router to the Starlink dish outside. Carefully organizing cables during installation can help prevent damage from weather, foot traffic, or sharp bends.
Keeping the cables secure and protected also improves long-term performance and reduces the chances of connection problems later.
Step 5: Plug in the System and Connect to WiFi

Once all cables are connected properly, the system can be plugged into a power outlet to begin the startup process.
After a short wait, a temporary Starlink WiFi network appears in the phone’s WiFi settings.
Connecting to this network allows the setup process to continue inside the Starlink app. The dish automatically begins preparing for satellite connection after the network pairing process is completed.
This part of the installation normally takes only a few minutes under good weather conditions.
Step 6: Wait for the Dish to Find Satellites
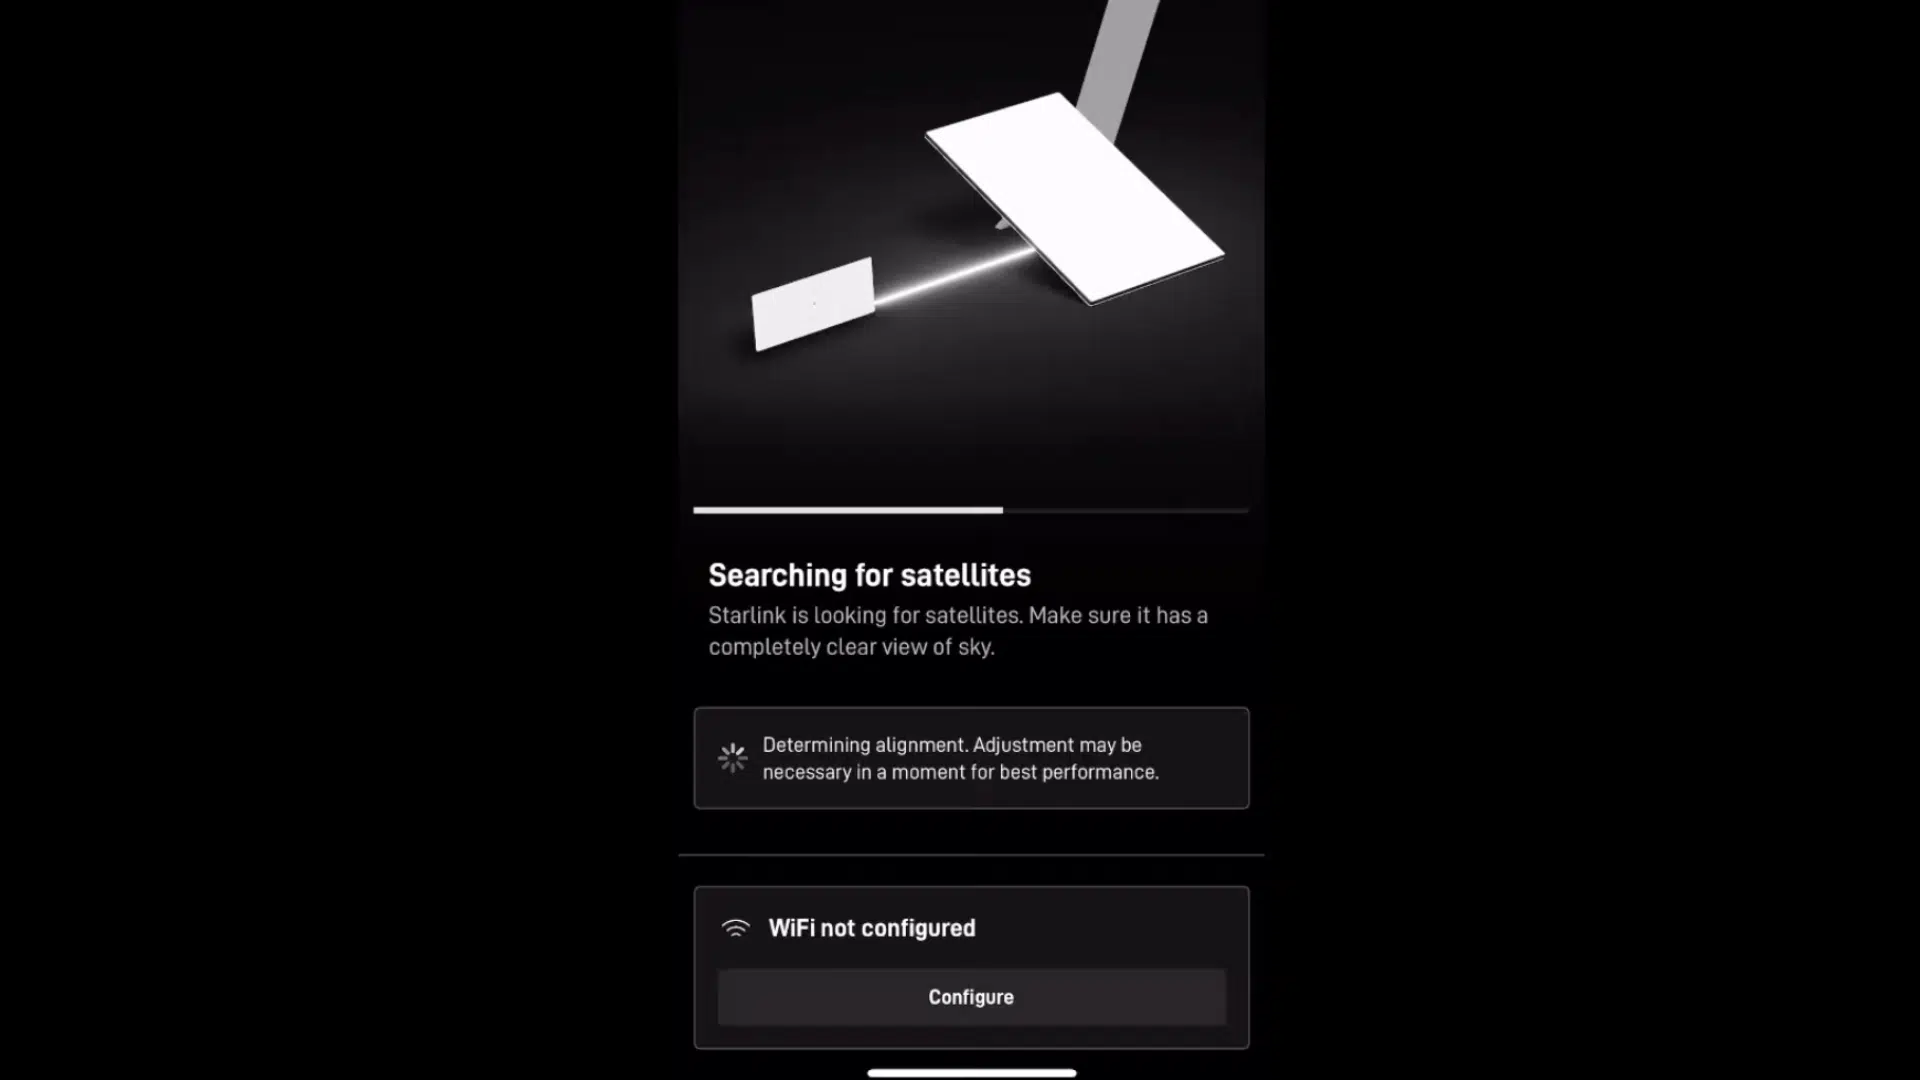
After connecting to the network, the Starlink dish automatically begins searching for nearby satellites. During this process, the app may show alignment warnings if the dish angle needs adjustment.
Small movements can improve positioning and help the system connect more efficiently.
Proper dish alignment is important because incorrect placement may lead to unstable internet speeds or connection drops.
Once the dish locks onto satellites successfully, the internet connection process continues without requiring complicated manual adjustments or technical setup experience.
Step 7: Check for Obstructions and Signal Problems
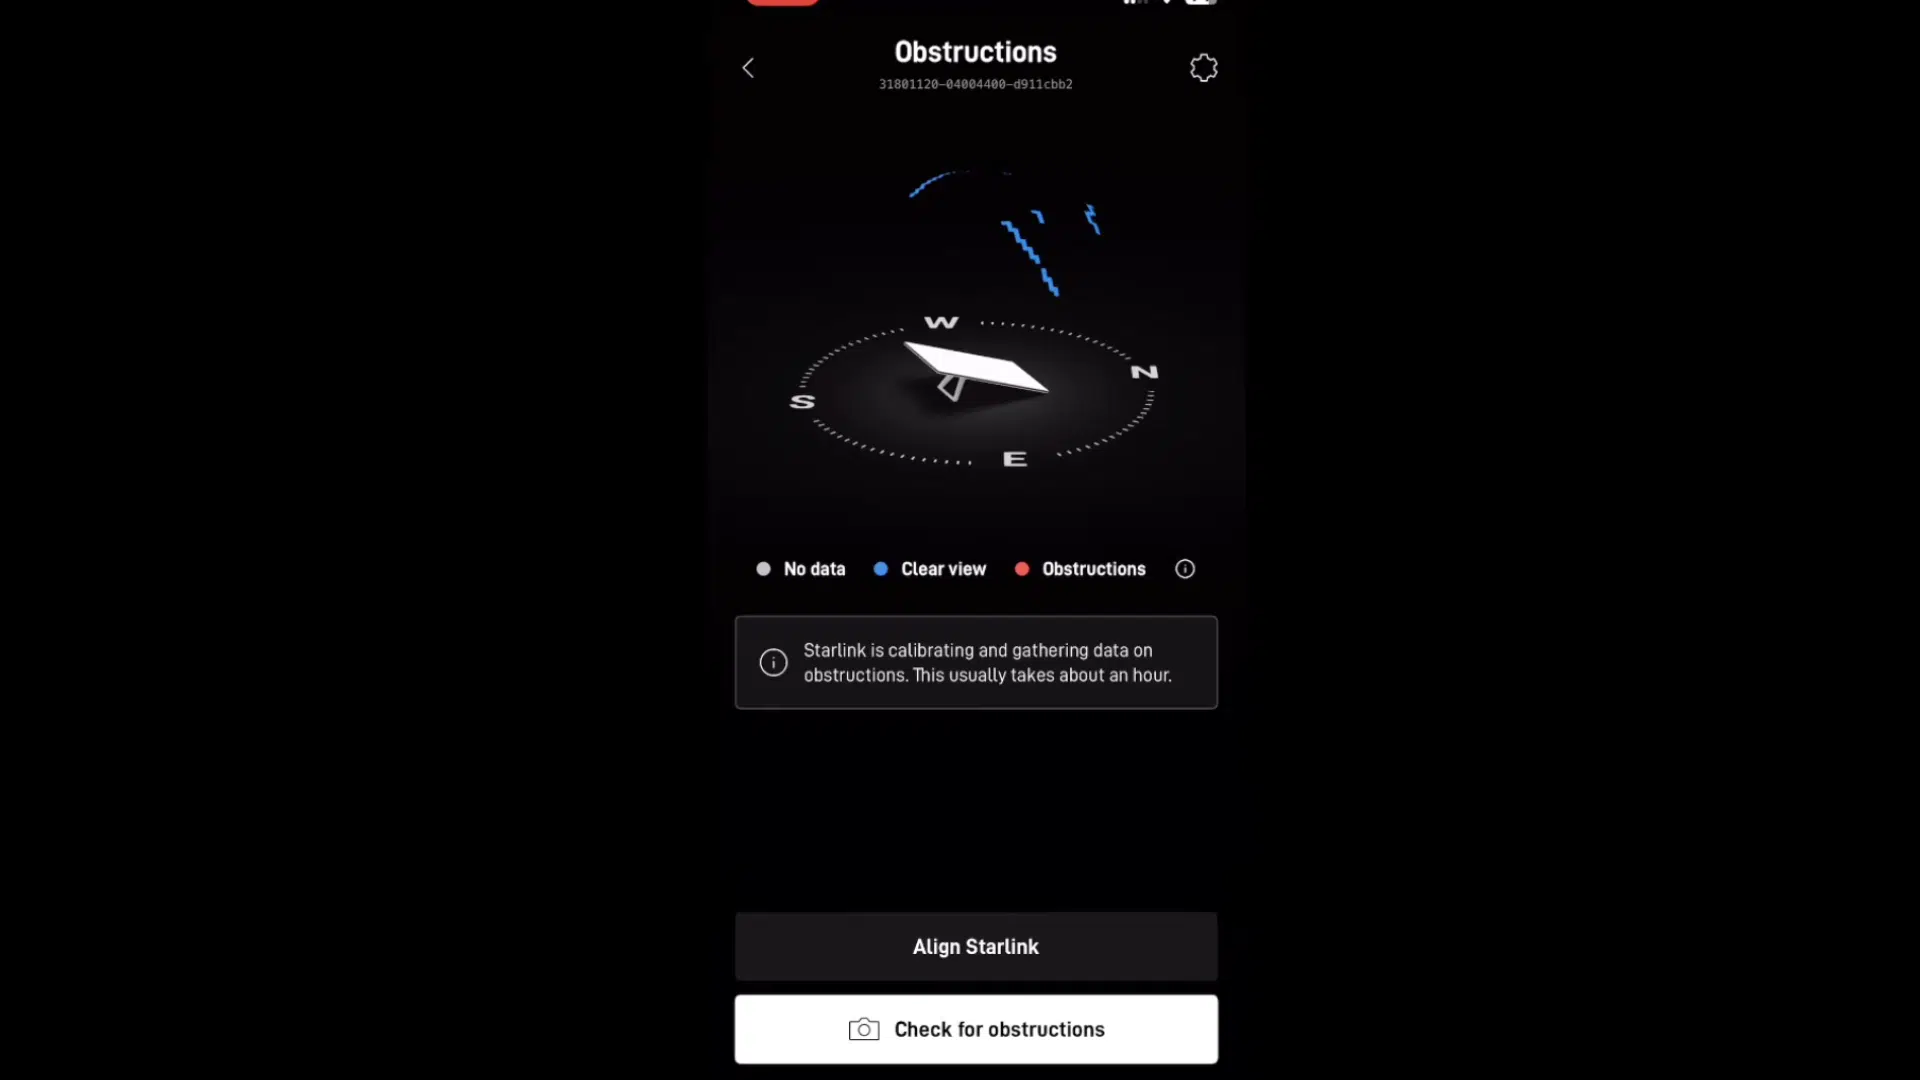
The Starlink app includes an obstruction scanning feature that checks whether trees, roofs, or other objects block the satellite signal.
Blue sections in the app represent clear-sky visibility, while red sections indicate possible signal obstructions. The system may need some time to fully scan the surrounding area and collect signal information.
Identifying obstructions early helps improve connection stability and internet speed later.
A location with fewer obstructions usually delivers smoother streaming, gaming, and video calling performance.
Step 8: Run a Speed Test
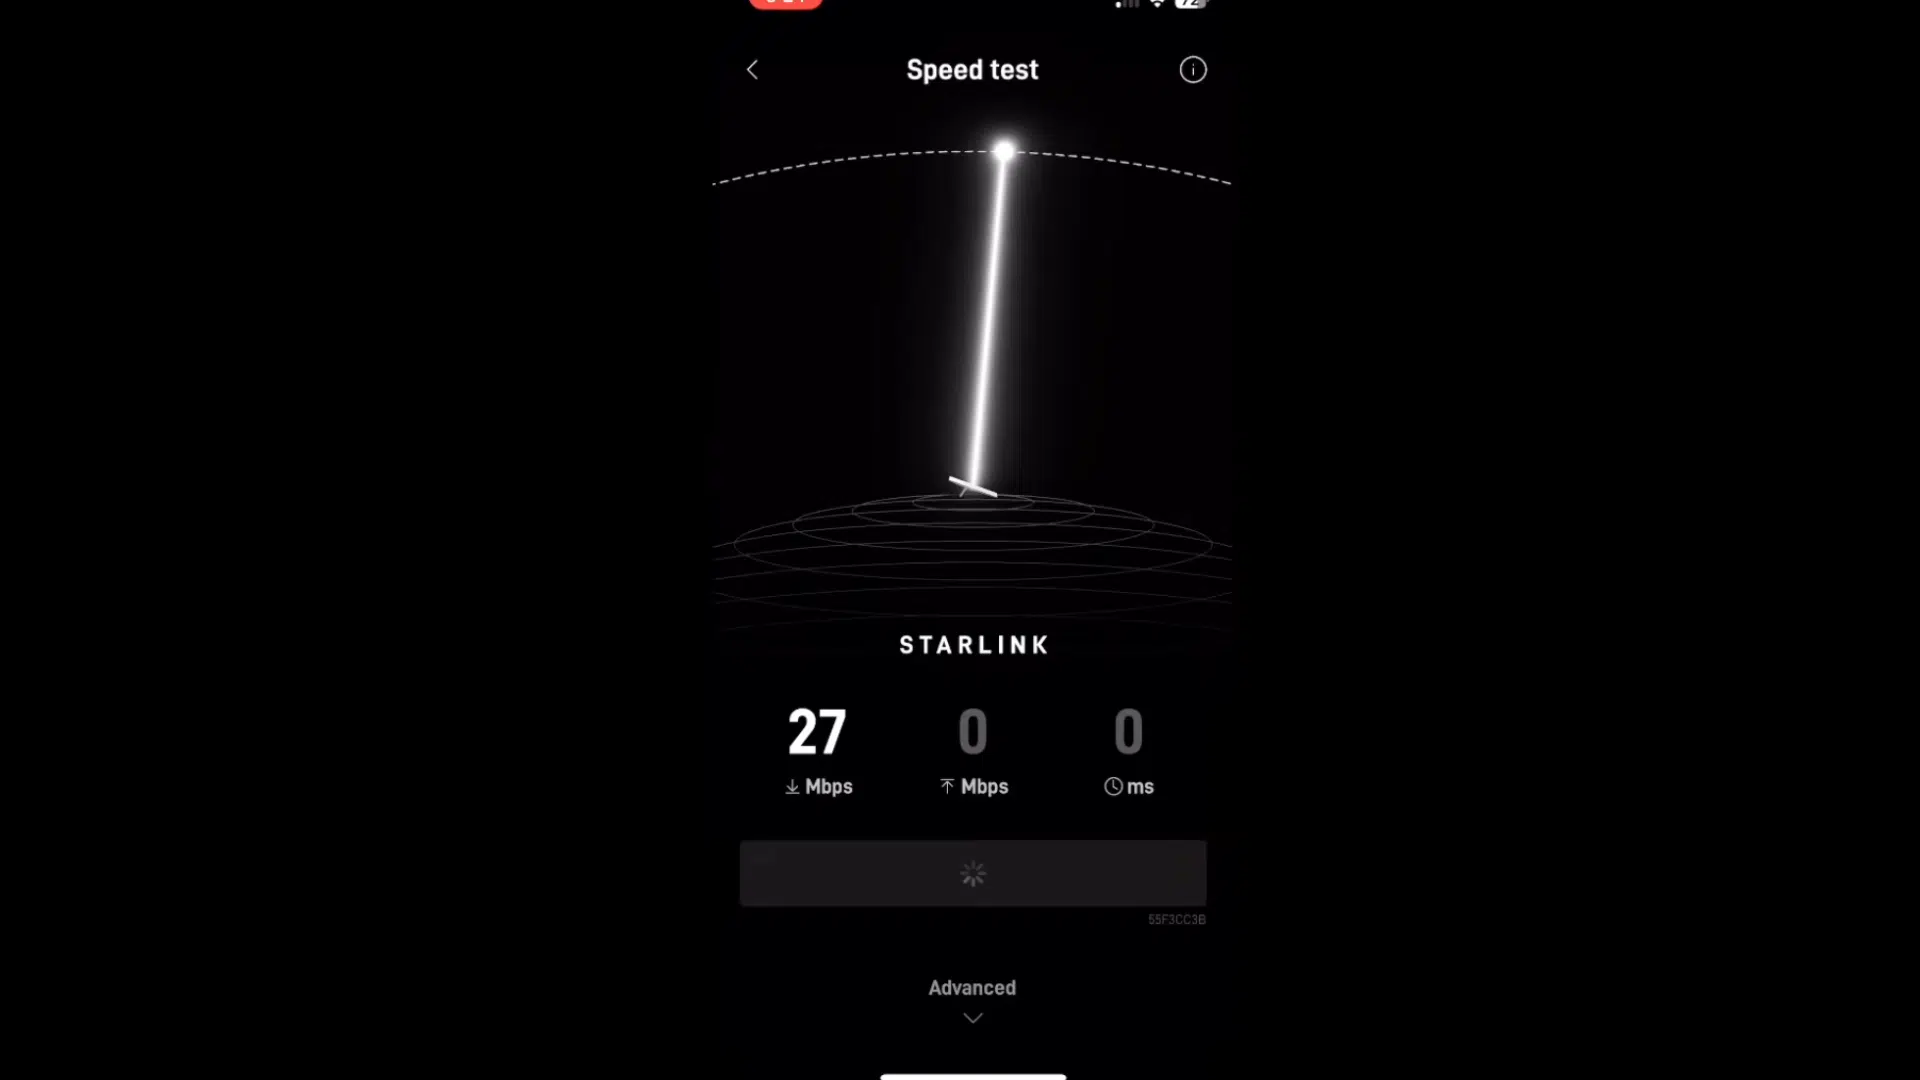
Running a speed test helps confirm whether the Starlink connection is working correctly after installation.
The Starlink app includes a built-in speed testing feature that measures download and upload performance directly from the network.
Speed results may vary depending on weather conditions, location, and satellite traffic at that time.
Testing the connection after setup can also help identify whether dish placement needs improvement.
High speeds and consistent results usually indicate that the system has been installed properly and is receiving a strong signal.
Step 9: Set a WiFi Name and Password
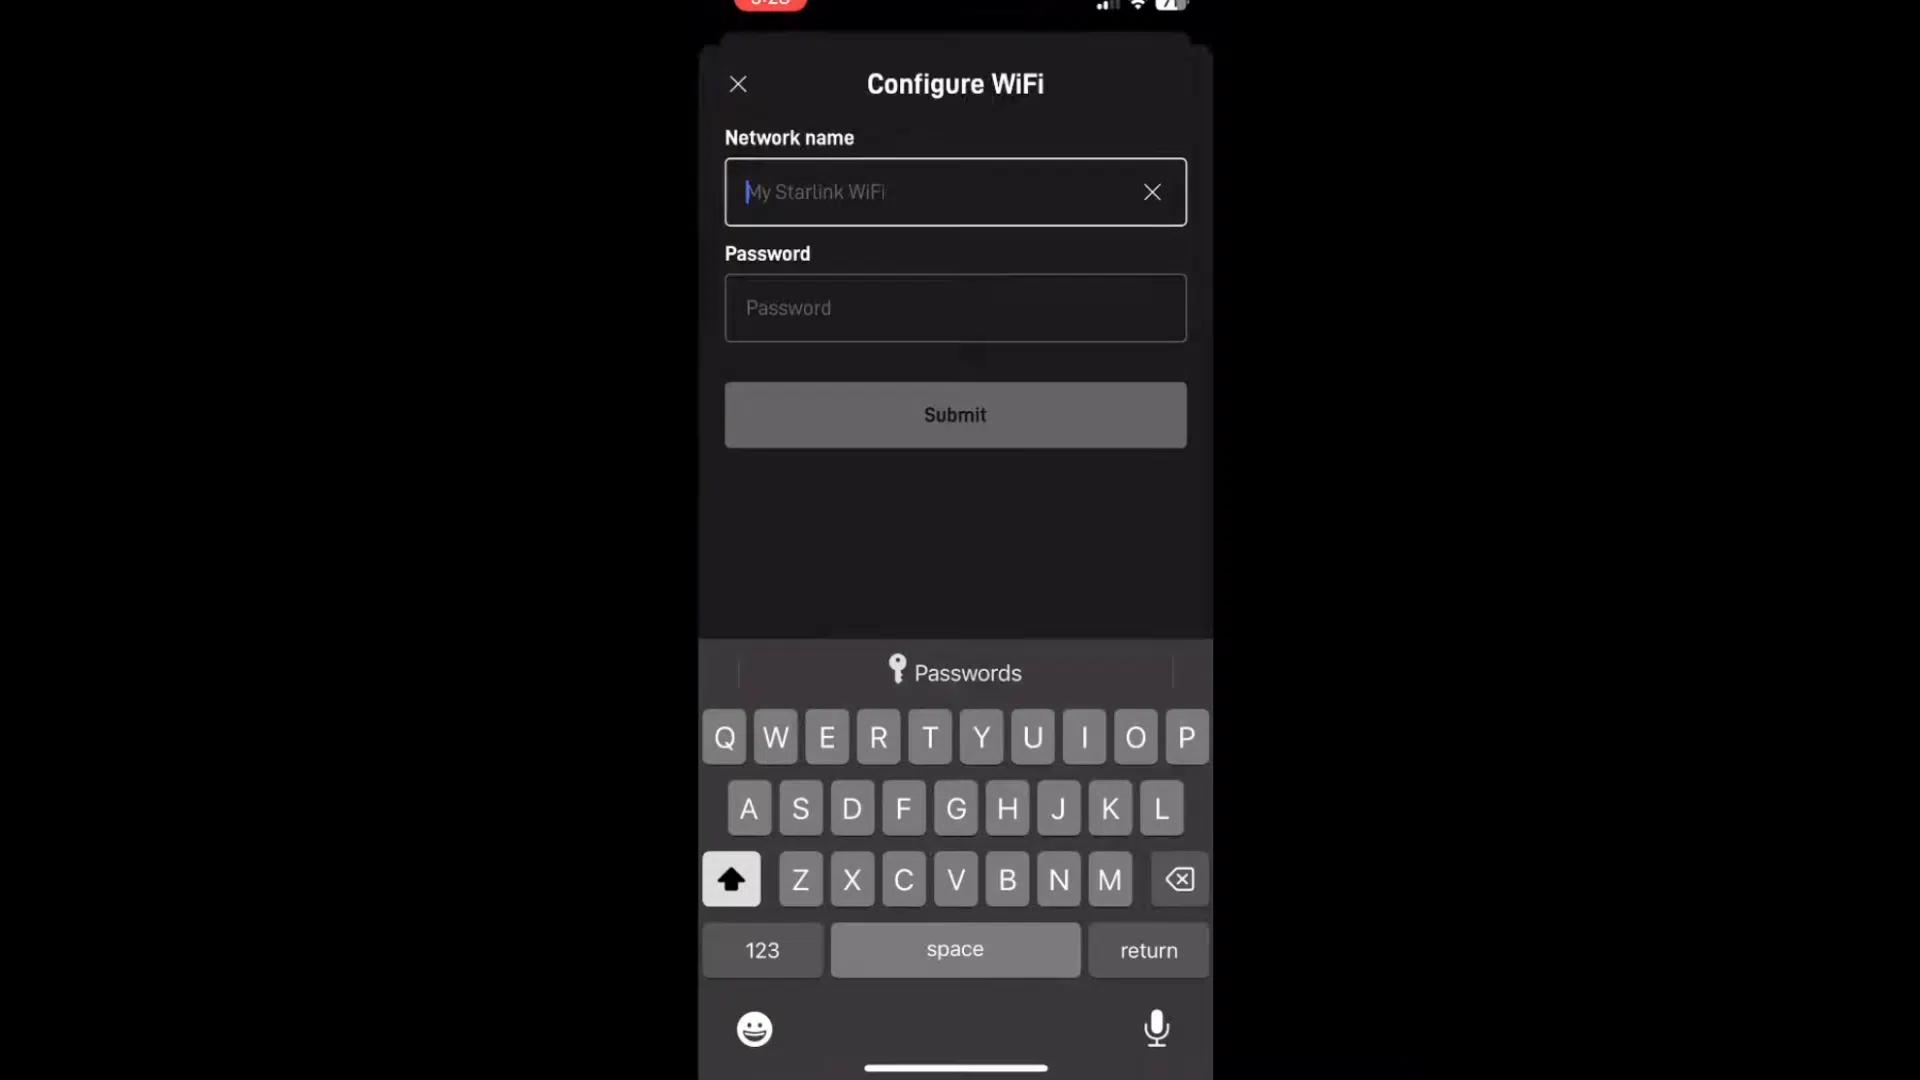
The final setup step involves creating a custom WiFi network name and password for better security and easier device connection.
This process can be completed directly inside the Starlink app after the internet connection becomes active.
A strong password helps protect the network from unauthorized access and improves overall home internet safety.
Renaming the network can also make it easier to identify among nearby Wi-Fi networks. After completing this step, the Starlink internet setup process is ready for regular everyday use.
This tutorial is based on a helpful video by TechTalkvideo. You can check out the original video on their YouTube channel here or watch it below.
Best Place to Mount Your Starlink Dish
Choosing the right mounting location is important because the Starlink dish needs a wide and clear view of the sky for the best signal strength and a stable internet connection.
| Mounting Location | Why It Works Well |
|---|---|
| Roof Mount | Provides a higher position with fewer signal obstructions from trees or buildings. |
| Wall Mount | Works well when the roof is difficult to access and still offers good sky visibility. |
| Pole Mount | A good option for open yards or properties with limited roof space. |
| Ground Mount | Suitable for temporary setups or testing signal strength before permanent installation. |
| Deck or Balcony Mount | Helpful for smaller homes or cabins with open sky access nearby. |
| Chimney Mount | Offers extra height for better satellite visibility in areas with tall trees. |
| RV or Mobile Mount | Ideal for travel setups and temporary internet access while moving between locations. |
How Long Does Starlink Installation Take?
Most Starlink installations take between 30 minutes and 2 hours, depending on the setup type and installation location.
A temporary setup using the standard kickstand is usually much faster because it requires fewer tools and less cable work.
Permanent installations on roofs, walls, or poles may take extra time for mounting, cable routing, and dish alignment.
Weather conditions, nearby obstructions, and signal testing can also affect the total setup time. After installation, the Starlink dish typically takes a short time to connect to satellites and complete calibration.
Once the system finishes setup, the internet connection becomes ready for regular use, streaming, gaming, and daily online activities.
When to Call a Professional for Starlink Installation?
Professional installation may be helpful when the setup location is difficult to access or requires extra mounting work. Some homeowners also prefer expert help for safer cable routing and stronger long-term installation support.
- Roof Installation on Tall Homes: Steep or high roofs may increase safety risks during mounting and cable setup.
- Complex Cable Routing: Long cable runs through walls, attics, or ceilings may require professional installation tools and experience.
- Poor Signal Due to Obstructions: Heavy tree coverage or nearby buildings may require advanced mounting solutions for better sky visibility.
- Permanent Pole or Wall Mounting: Secure wall mounts or pole installations may need drilling and stronger structural support.
- Frequent Connection Problems: Ongoing signal drops or alignment issues after setup may require professional troubleshooting assistance.
- Limited Installation Experience: Professional help can reduce setup errors and save homeowners unfamiliar with networking or mounting equipment time.
Professional Starlink Installation vs DIY Setup
Both professional and DIY Starlink installation methods can provide a stable internet connection. The better option often depends on roof access, mounting difficulty, cable routing, and overall installation experience
| Feature | DIY Starlink Setup | Professional Starlink Installation |
|---|---|---|
| Installation Cost | Lower overall cost | Higher due to labor charges |
| Setup Time | Faster for simple setups | May take longer for advanced mounting |
| Tools Needed | Basic household tools | Professional equipment and tools |
| Roof Safety | May involve safety risks | Safer handling on steep or tall roofs |
| Cable Management | Simple cable routing | Cleaner and more organized installation |
| Mounting Quality | Depends on experience | Usually more secure and stable |
| Best For | Ground or simple roof setups | Complex homes or difficult installations |
| Technical Support | Self-troubleshooting required | Expert help during installation |
Common Mistakes to Avoid During Starlink Setup
Some Starlink setup problems can affect internet speed, signal strength, or connection stability during installation. Most issues can be fixed with better dish placement, cable checks, or small setup adjustments.
- Placing the Dish Near Trees or Buildings: Nearby obstructions can block satellite signals and reduce connection stability. A clear view of the sky helps improve performance.
- Using Loose Cable Connections: Improperly connected cables may cause internet interruptions or power issues. Securing all cable connections helps prevent setup problems.
- Skipping the Obstruction Check: Ignoring the obstruction scan in the Starlink app may lead to signal issues later. The app helps identify the best installation spot.
- Installing the Dish Too Low: Low placement can increase signal blockage from roofs, fences, or nearby objects. Higher mounting locations usually provide better connectivity.
- Leaving Cables Unprotected: Exposed cables may get damaged by weather conditions or foot traffic. Cable clips and covers help protect the wiring.
- Not Securing the Mount Properly: A loose mount may shift during strong winds, affecting dish alignment. Stable mounting improves signal reliability and long-term performance.
Conclusion
Setting up Starlink at home may seem hard at first, but it gets easier once the equipment is connected properly.
I have noticed that small setup details, like choosing a clear location and securing the cables properly, can make a big difference in internet performance and connection stability.
Many homeowners are now handling the installation themselves without needing expensive professional help.
The good thing about Starlink is that the setup process is flexible for different homes, cabins, RVs, and rural properties.
With the right placement and a little patience, reliable internet becomes possible in areas with limited service.
If Starlink has already been installed at your home, feel free to share the experience, setup tips, or connection results in the comments below!
Frequently Asked Questions
Can Starlink Be Installed without Professional Help?
Yes, Starlink is designed for self-installation with simple setup equipment and app guidance.
Will Starlink WiFi Work Through Walls?
Starlink WiFi can pass through walls, but thicker materials may weaken the signal indoors.
Is Starlink Better on the Ground or the Roof?
Roof placement usually provides better signal quality because there are fewer nearby obstructions.
Does Starlink Installation Require Drilling?
Drilling is often needed for permanent cable routing and cleaner indoor cable management.
Is Starlink Good for Streaming Netflix?
Starlink internet generally supports HD and 4K streaming with stable speeds and low buffering.