



Backing up your Android phone is one of the best ways to protect important files, photos, videos, contacts, and other personal data.
If your device is lost, damaged, or replaced, having a backup can make it much easier to recover your information and continue using your new device without losing important content.
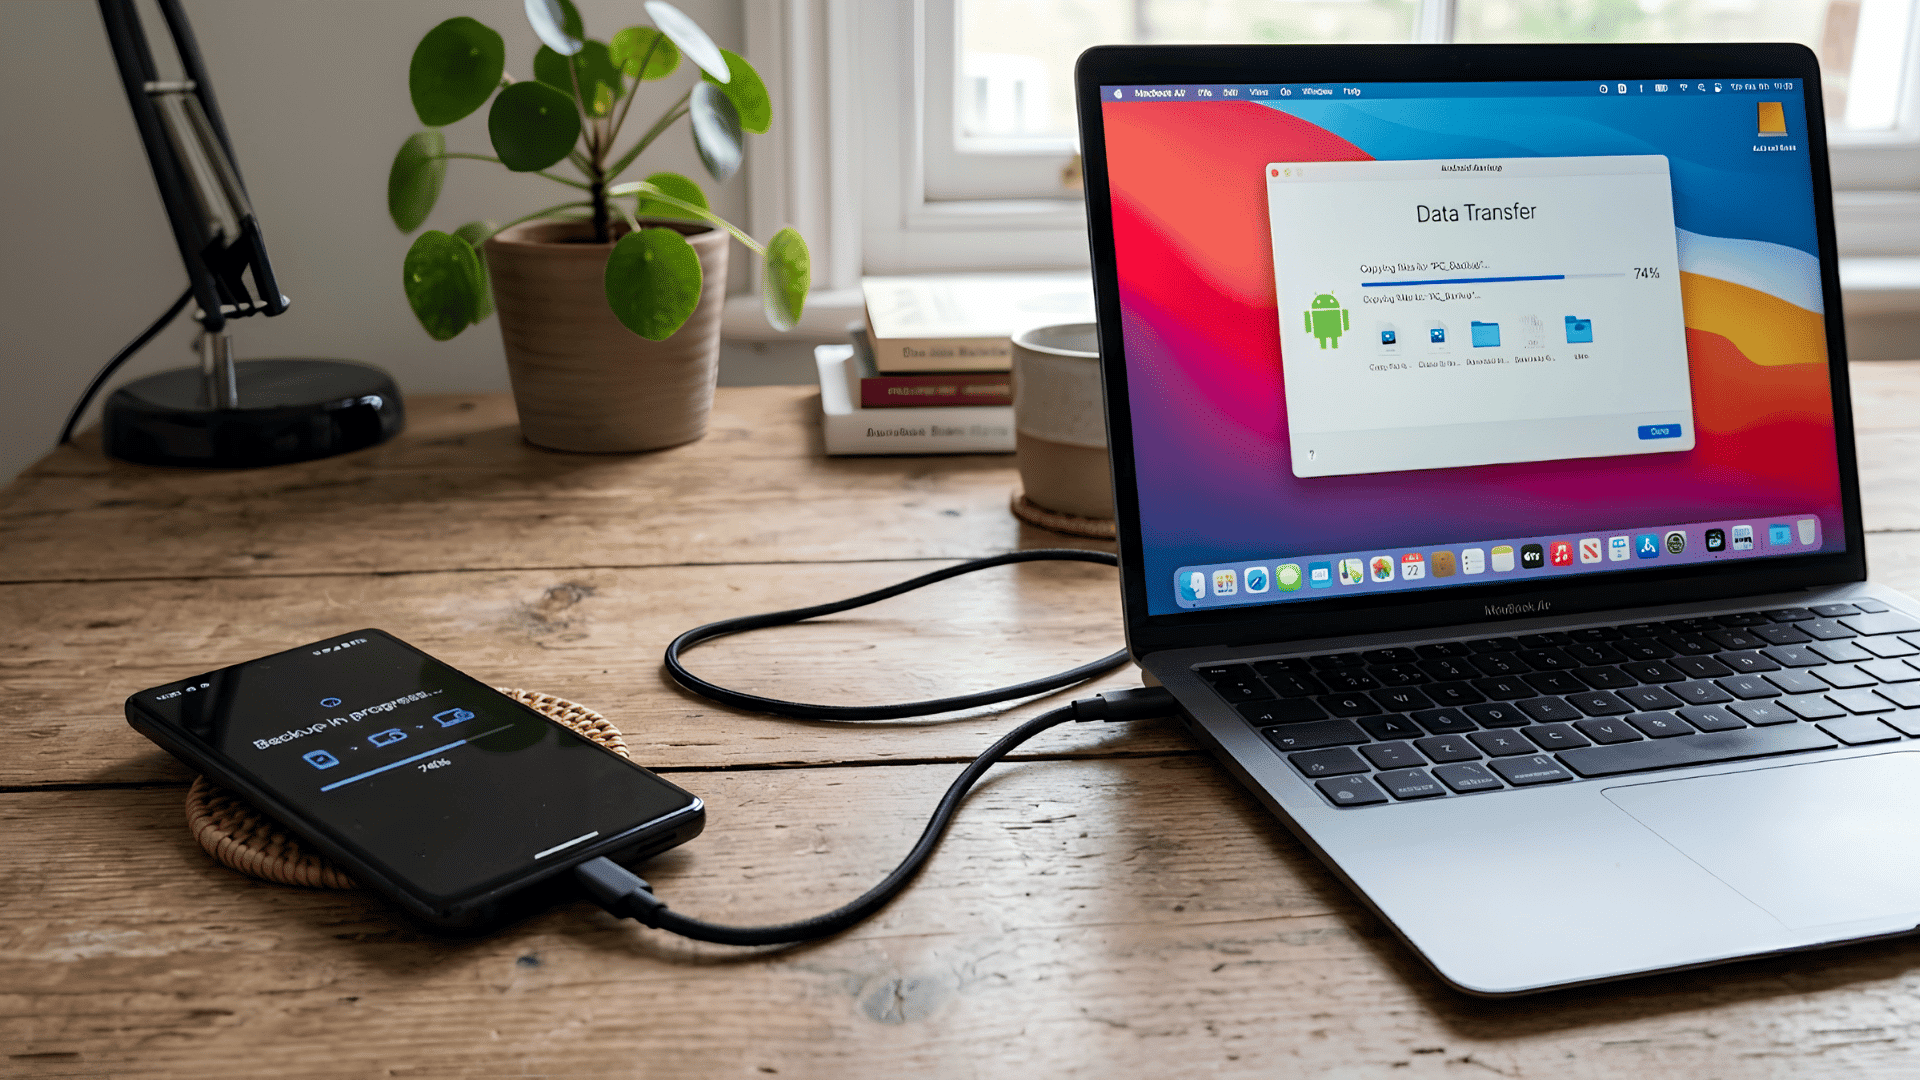
There are several ways to back up an Android phone to a PC.
Some methods allow you to manually copy files using a USB cable, while others use dedicated software to create a more complete backup.
The right option depends on the type of data you want to save and how much control you need over the process. This guide explains how to back up an Android phone to a PC using three different methods.
What Data Should You Back Up First?
Before choosing a backup method, decide which data you want to protect, as not every method backs up the same information.
- Photos and videos: Images and recordings stored in your Camera Roll or DCIM folder.
- Contacts: Especially if they are not already synced with your Google account.
- Text messages and call logs: These are not included in standard USB file transfers.
- App data: Such as WhatsApp chats, game progress, and app settings (where supported).
- Documents and downloads: Files saved from browsers, email attachments, or messaging apps.
Method 1: How to Back up an Android Phone to a PC Manually?
A manual backup is a simple way to copy photos, documents, and other files from your Android device to a computer.
Step 1: Create a New Folder on Your PC
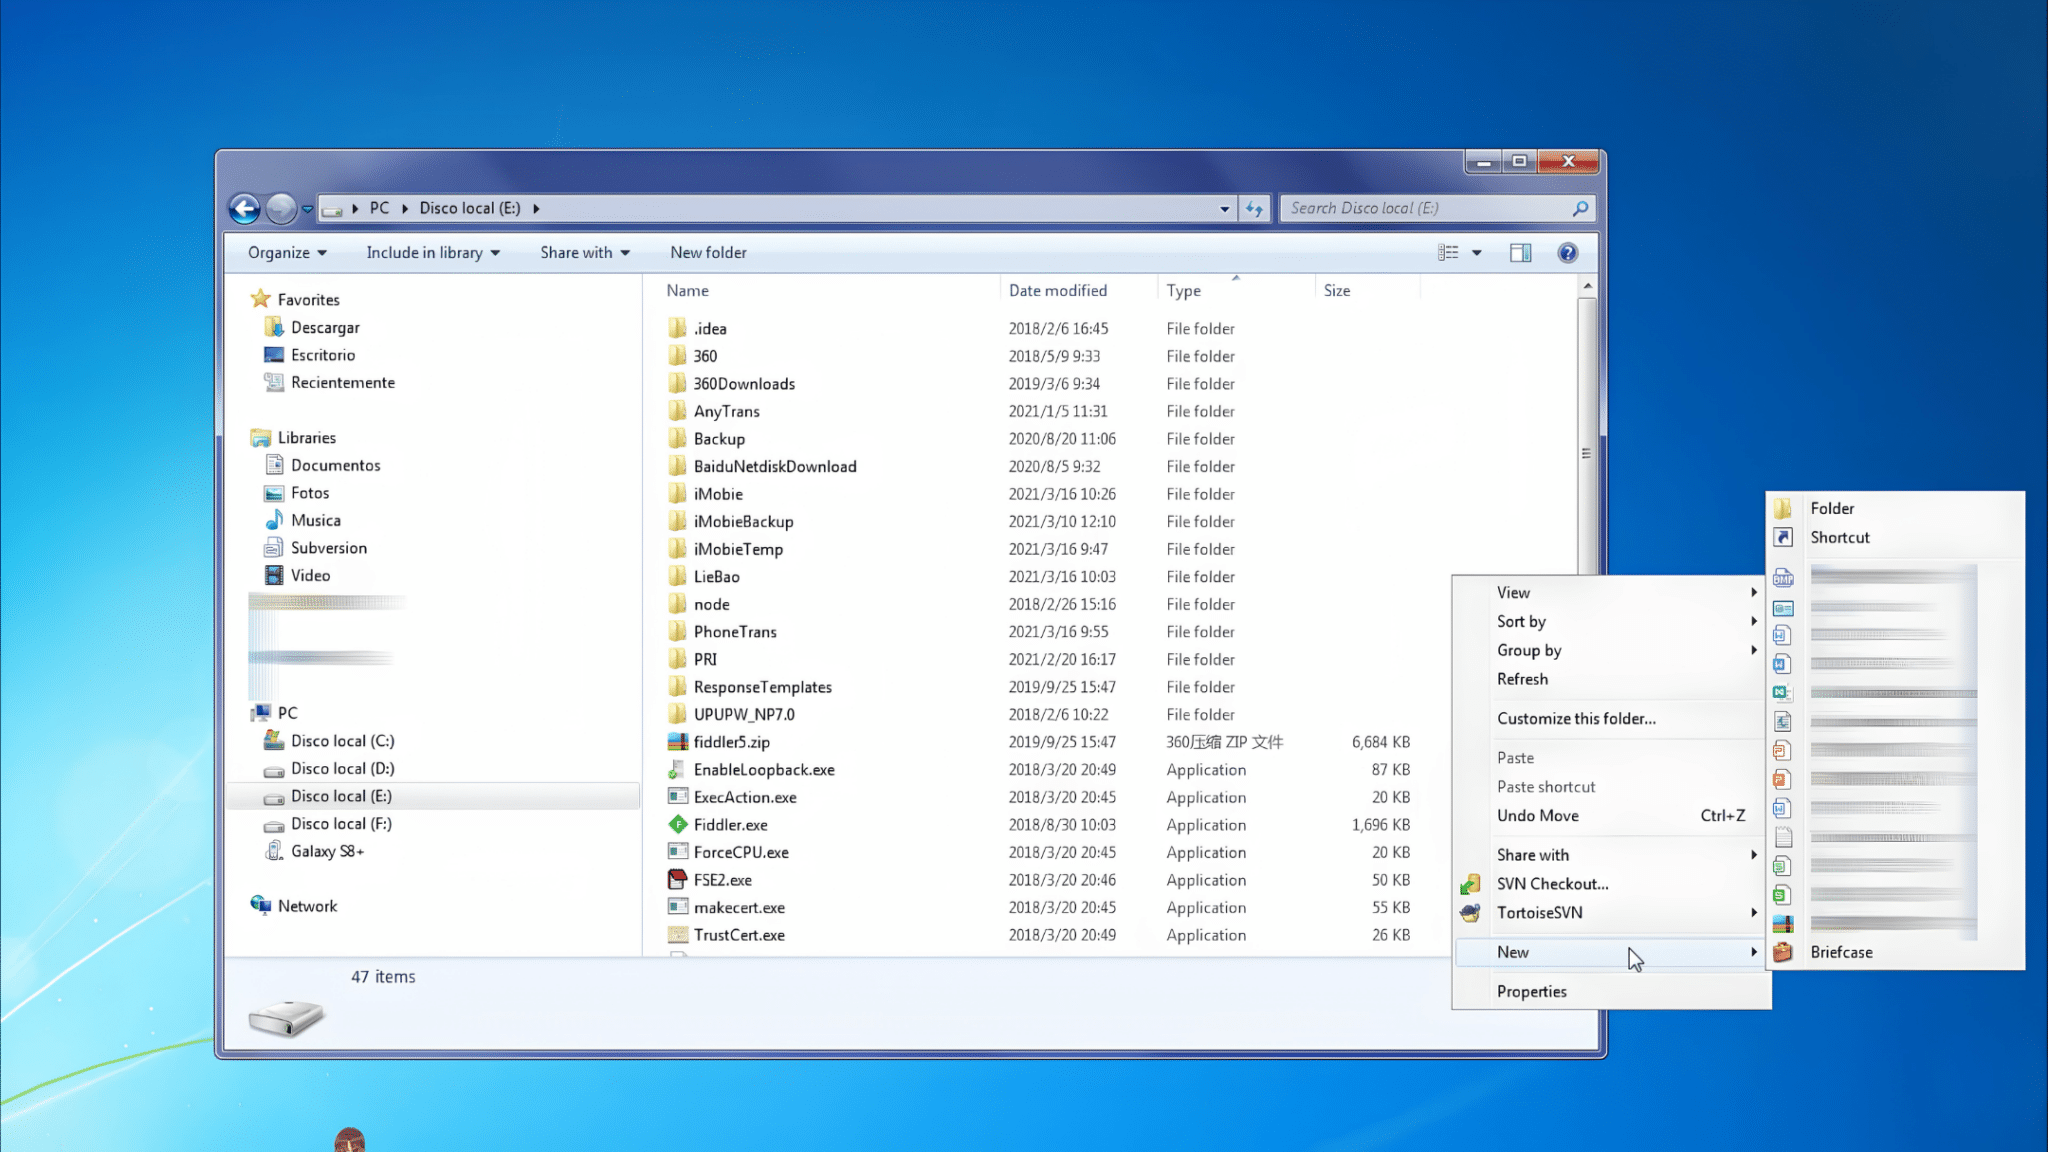
Open File Explorer on your computer and choose the drive where you want to save the backup. Right-click inside the drive, select New Folder, and create a folder specifically for your Android backup files.
Give the folder a clear name so it is easy to identify later.
Creating a dedicated folder helps keep backup files organized and prevents them from getting mixed with other documents.
It can also make future file transfers and data recovery much easier.
Step 2: Connect Your Android Phone Using a USB Cable
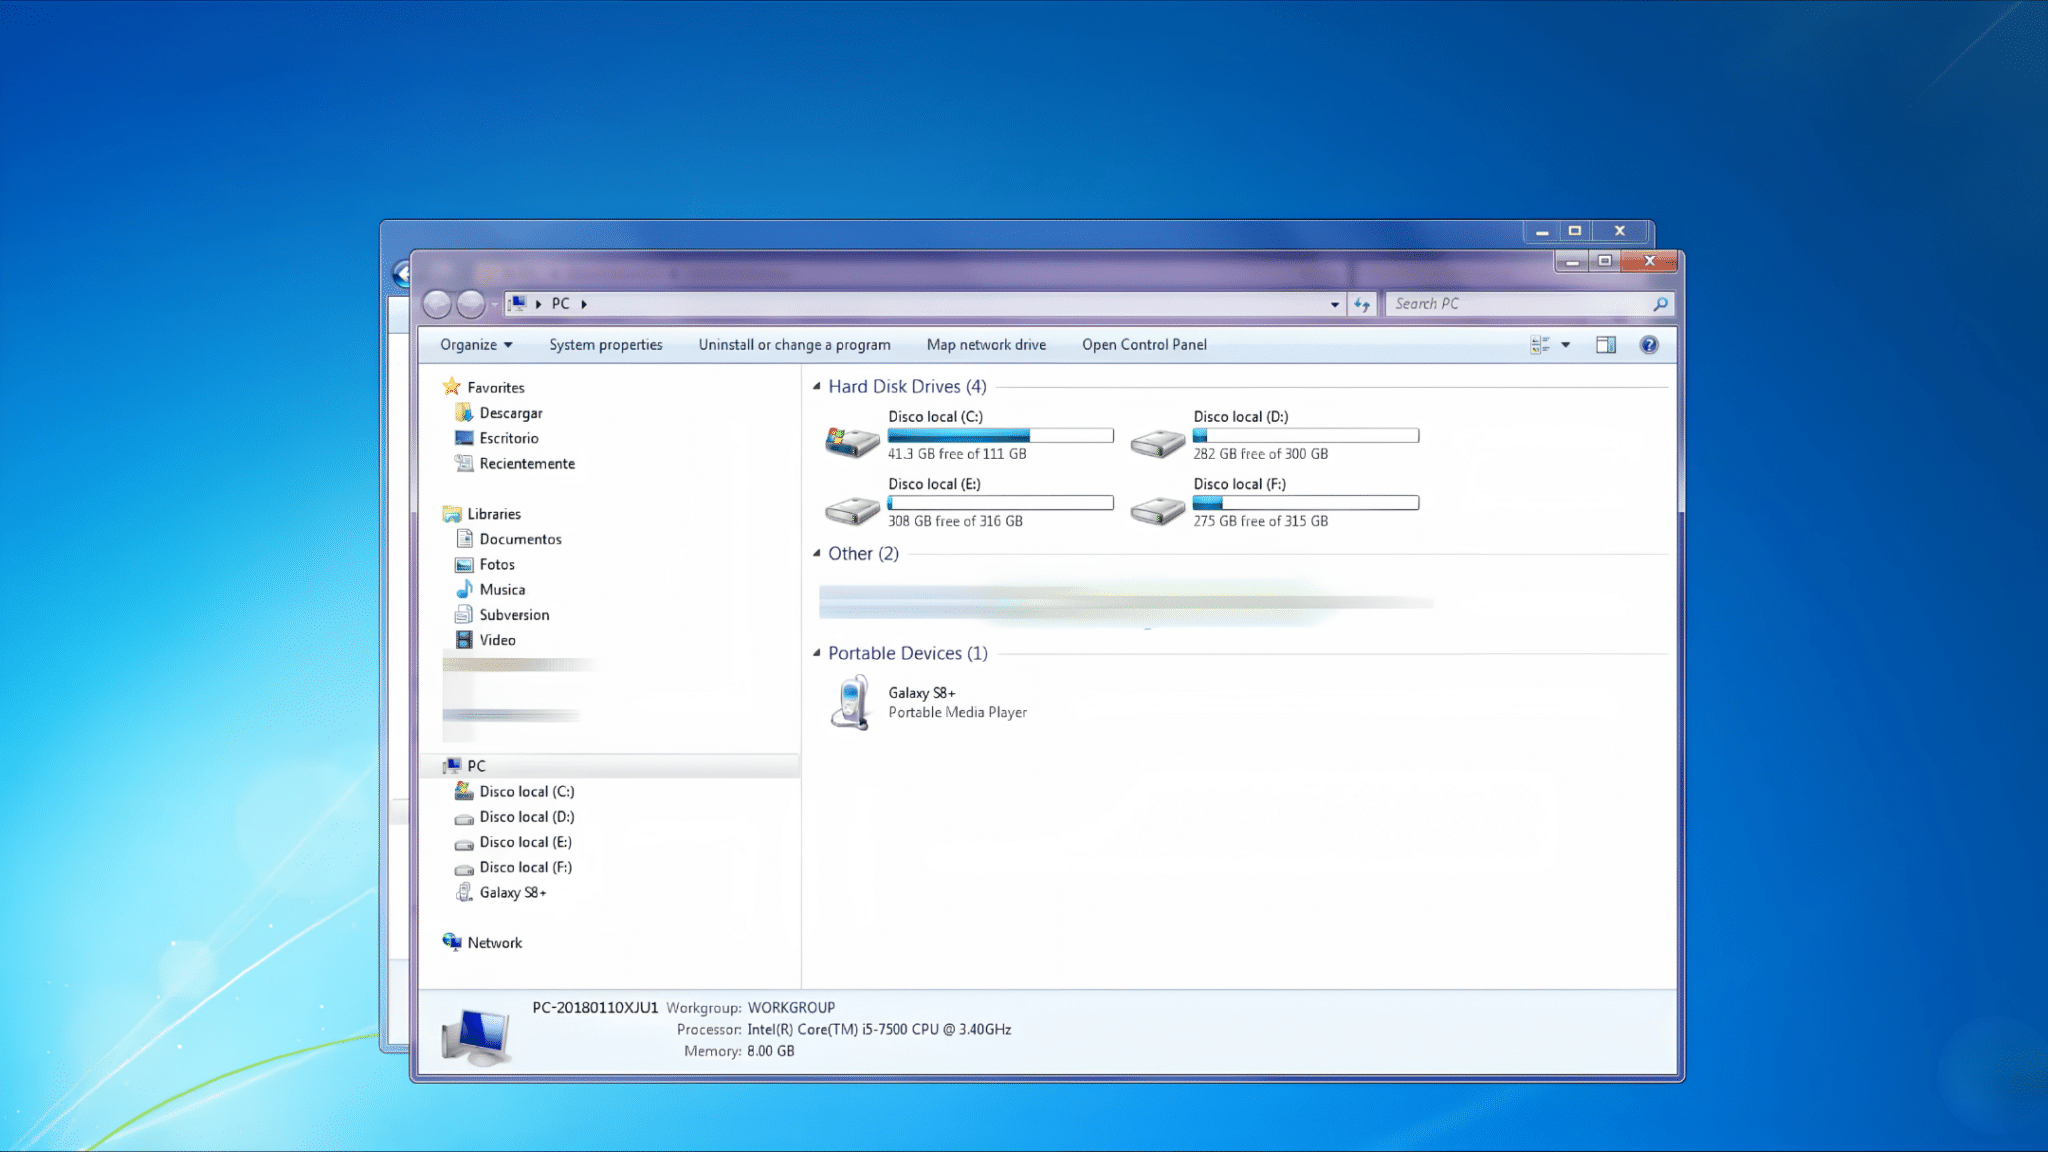
Use a USB cable to connect your Android phone to your computer. If a notification appears on the phone, select the option that allows file transfers or access to the device.
A stable connection is important to avoid interruptions during the backup process.
Using a reliable USB cable can help ensure that files transfer correctly. Once connected, the computer should recognize the device and allow access to its storage.
Step 3: Open Your Device Storage
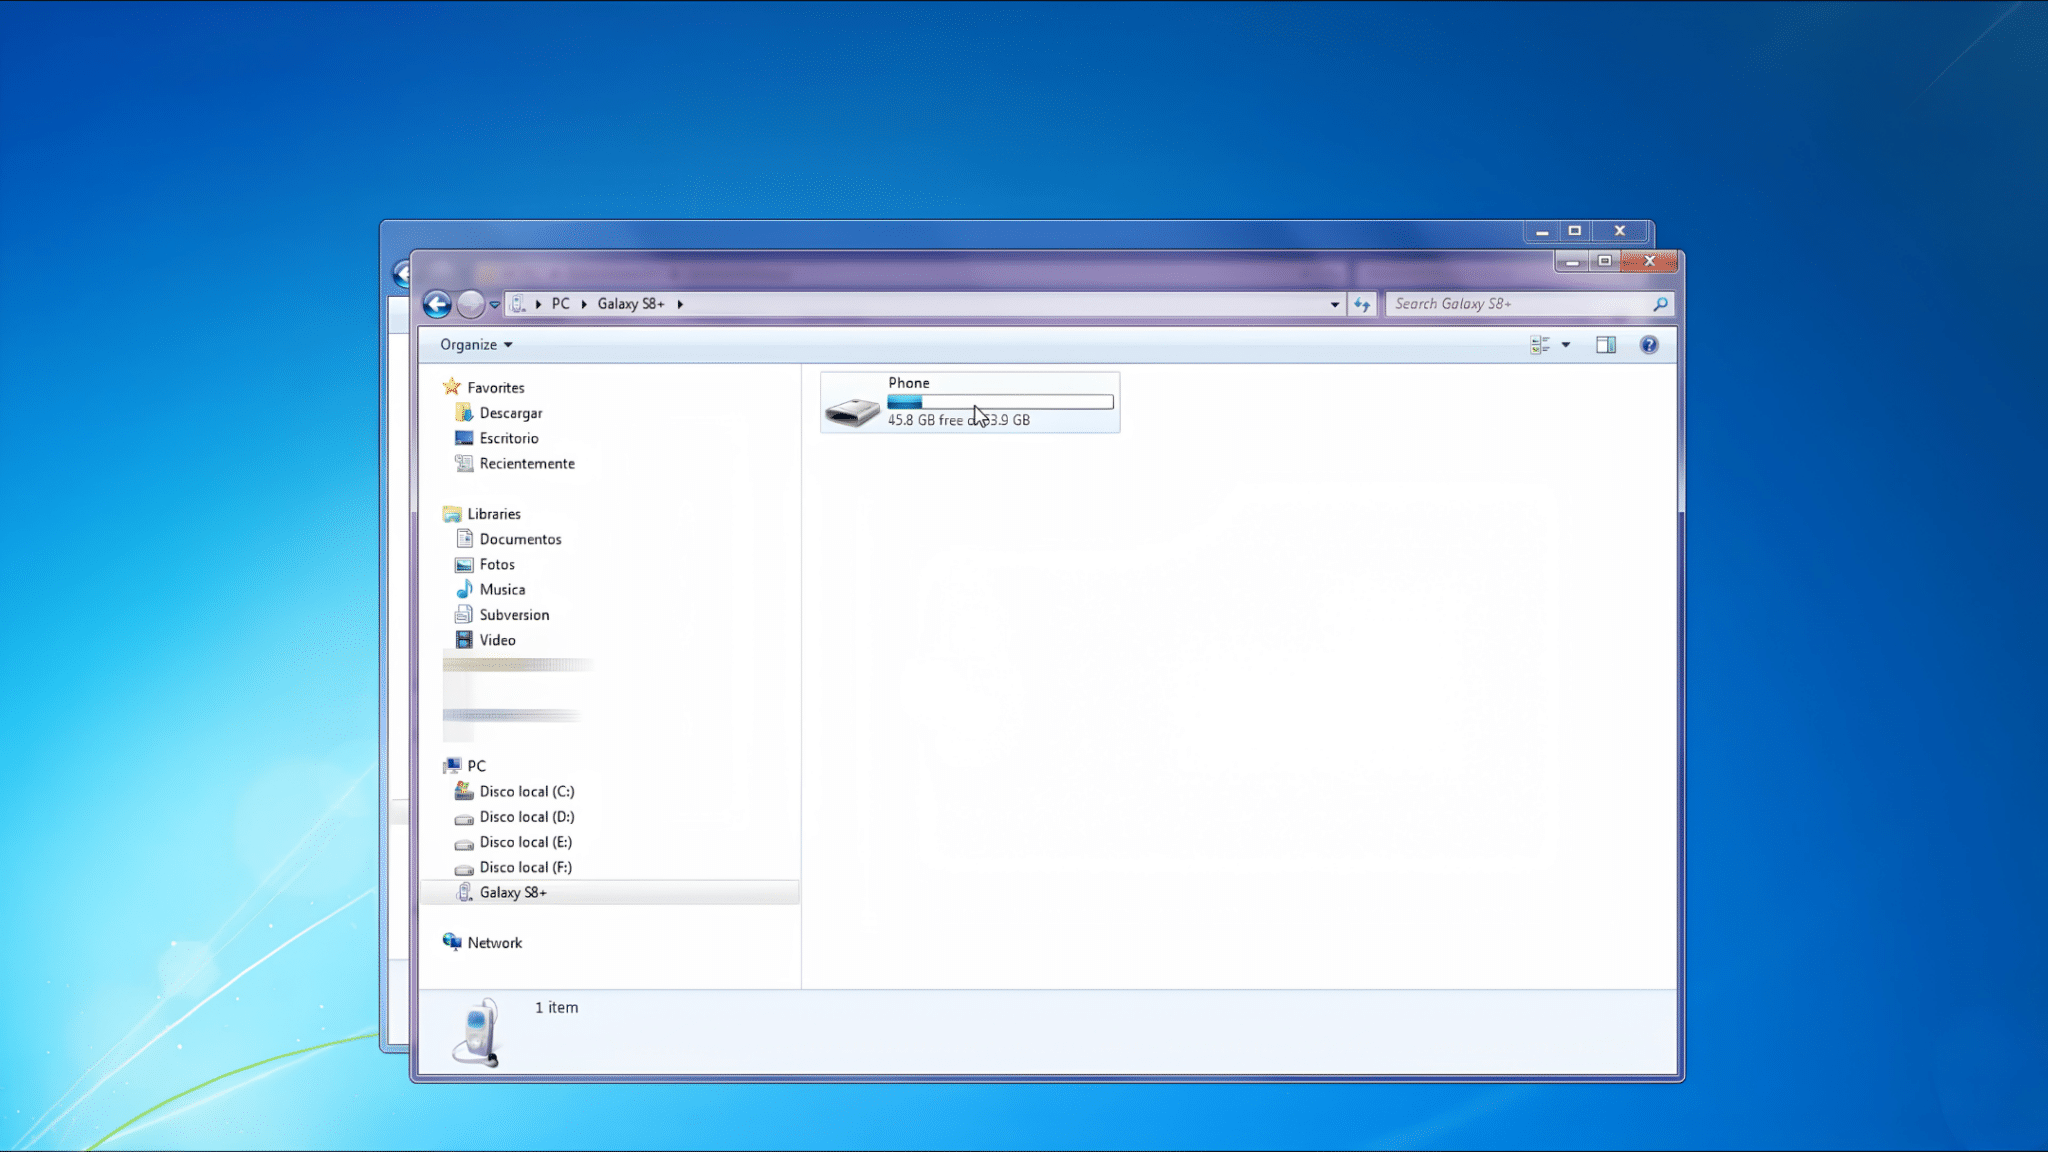
Open This PC on your computer and look for your Android phone under connected devices. Click the device name to access its internal storage and available folders.
You may see folders containing photos, videos, downloads, music, and other files.
Taking a moment to review these folders can help identify the data that needs to be backed up. This step ensures that important files are not accidentally missed.
Step 4: Copy and Paste Files to the Backup Folder
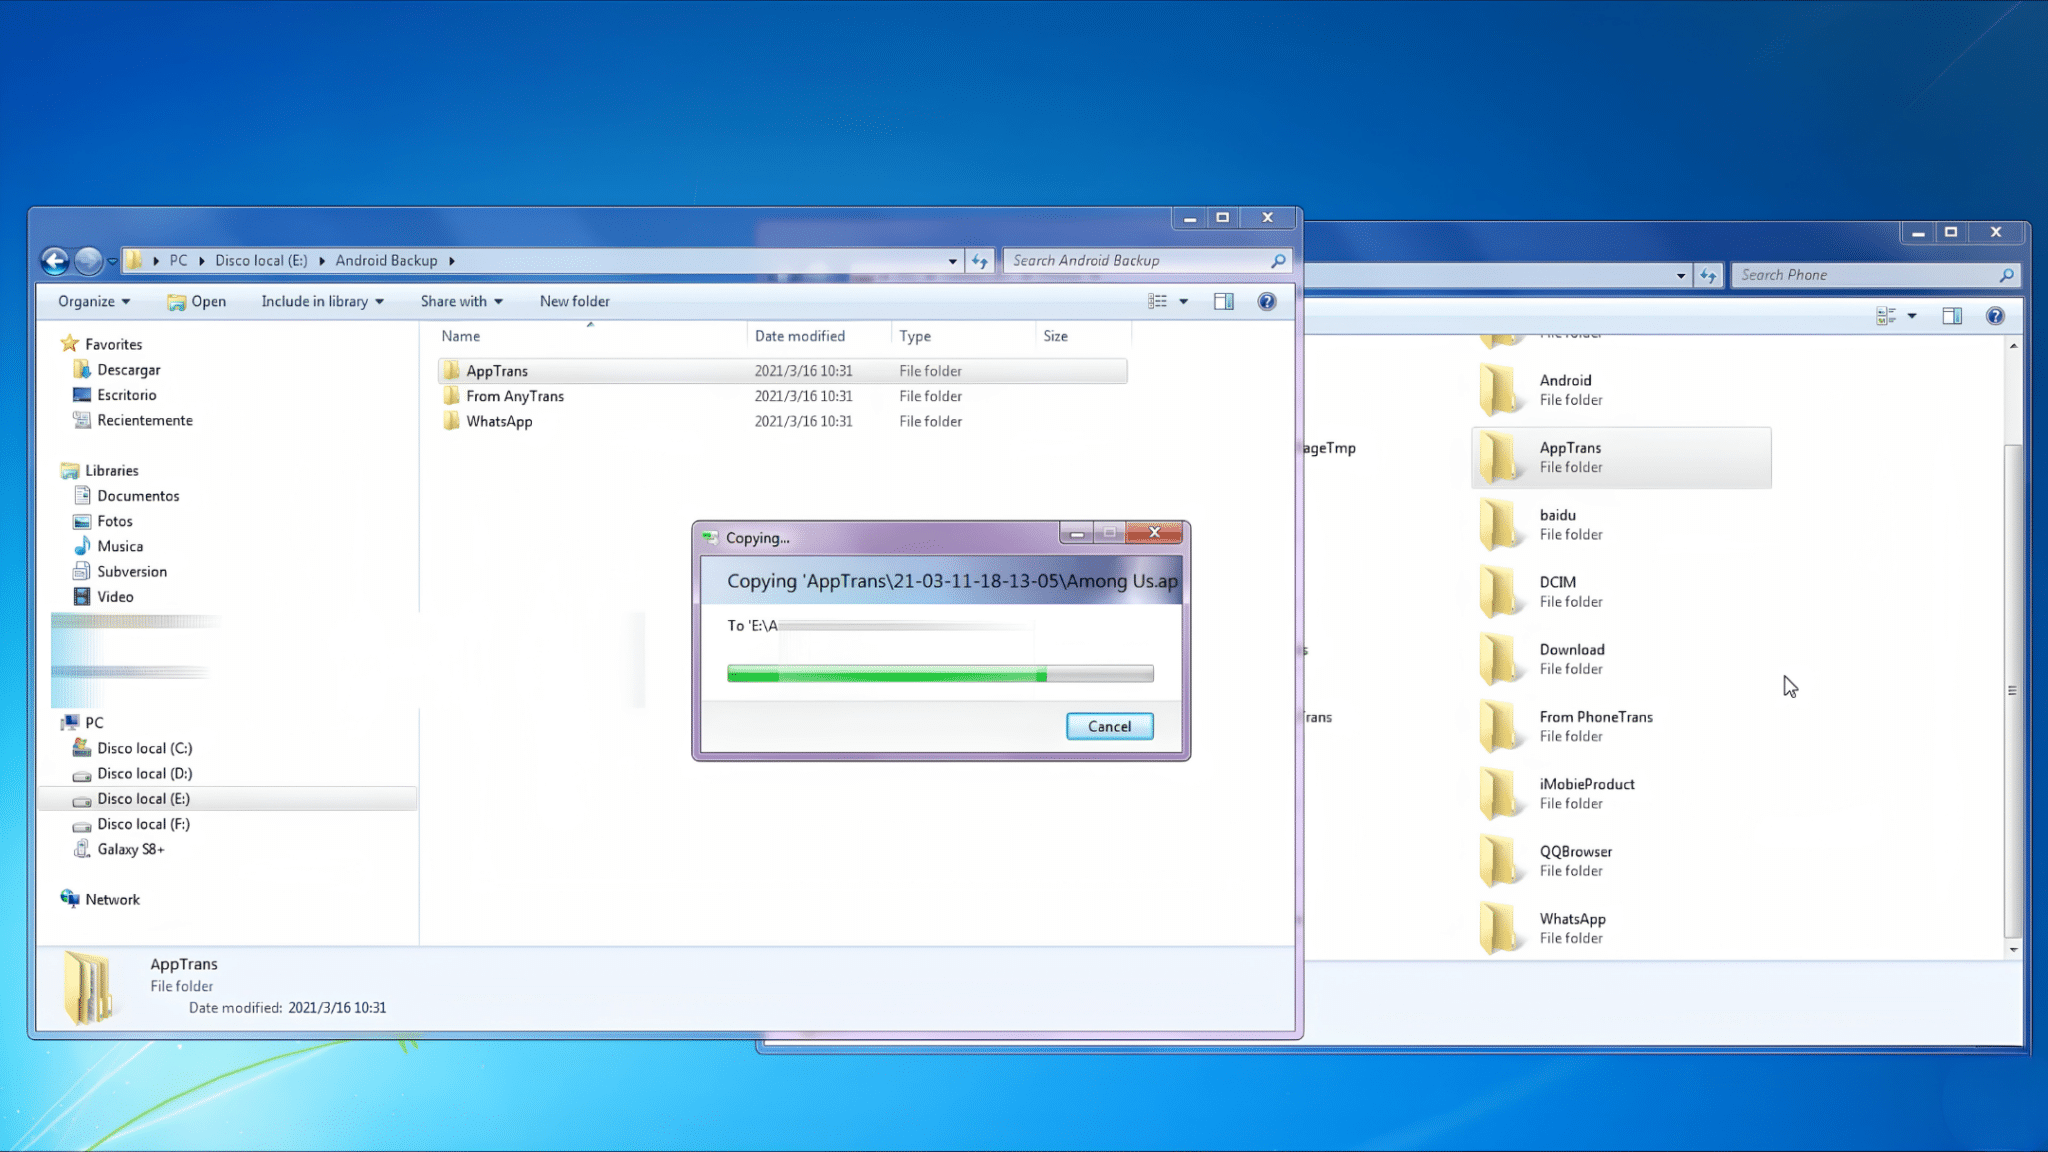
Select the files or folders you want to save, such as photos, videos, documents, and other personal data. Drag and drop them into the backup folder that was created earlier on the computer.
The transfer process may take a few minutes, depending on the size and number of files being copied.
Wait until the transfer is fully completed before disconnecting the device. Once finished, the selected data will be safely stored on the computer.
Method 2: How to Backup Android Phone to a PC With PhoneTrans
If you want to back up more than just photos and documents, PhoneTrans offers a more complete solution. It allows you to back up data and restore it later to the same device.
Step 1: Open PhoneTrans and Connect Your Android Phone
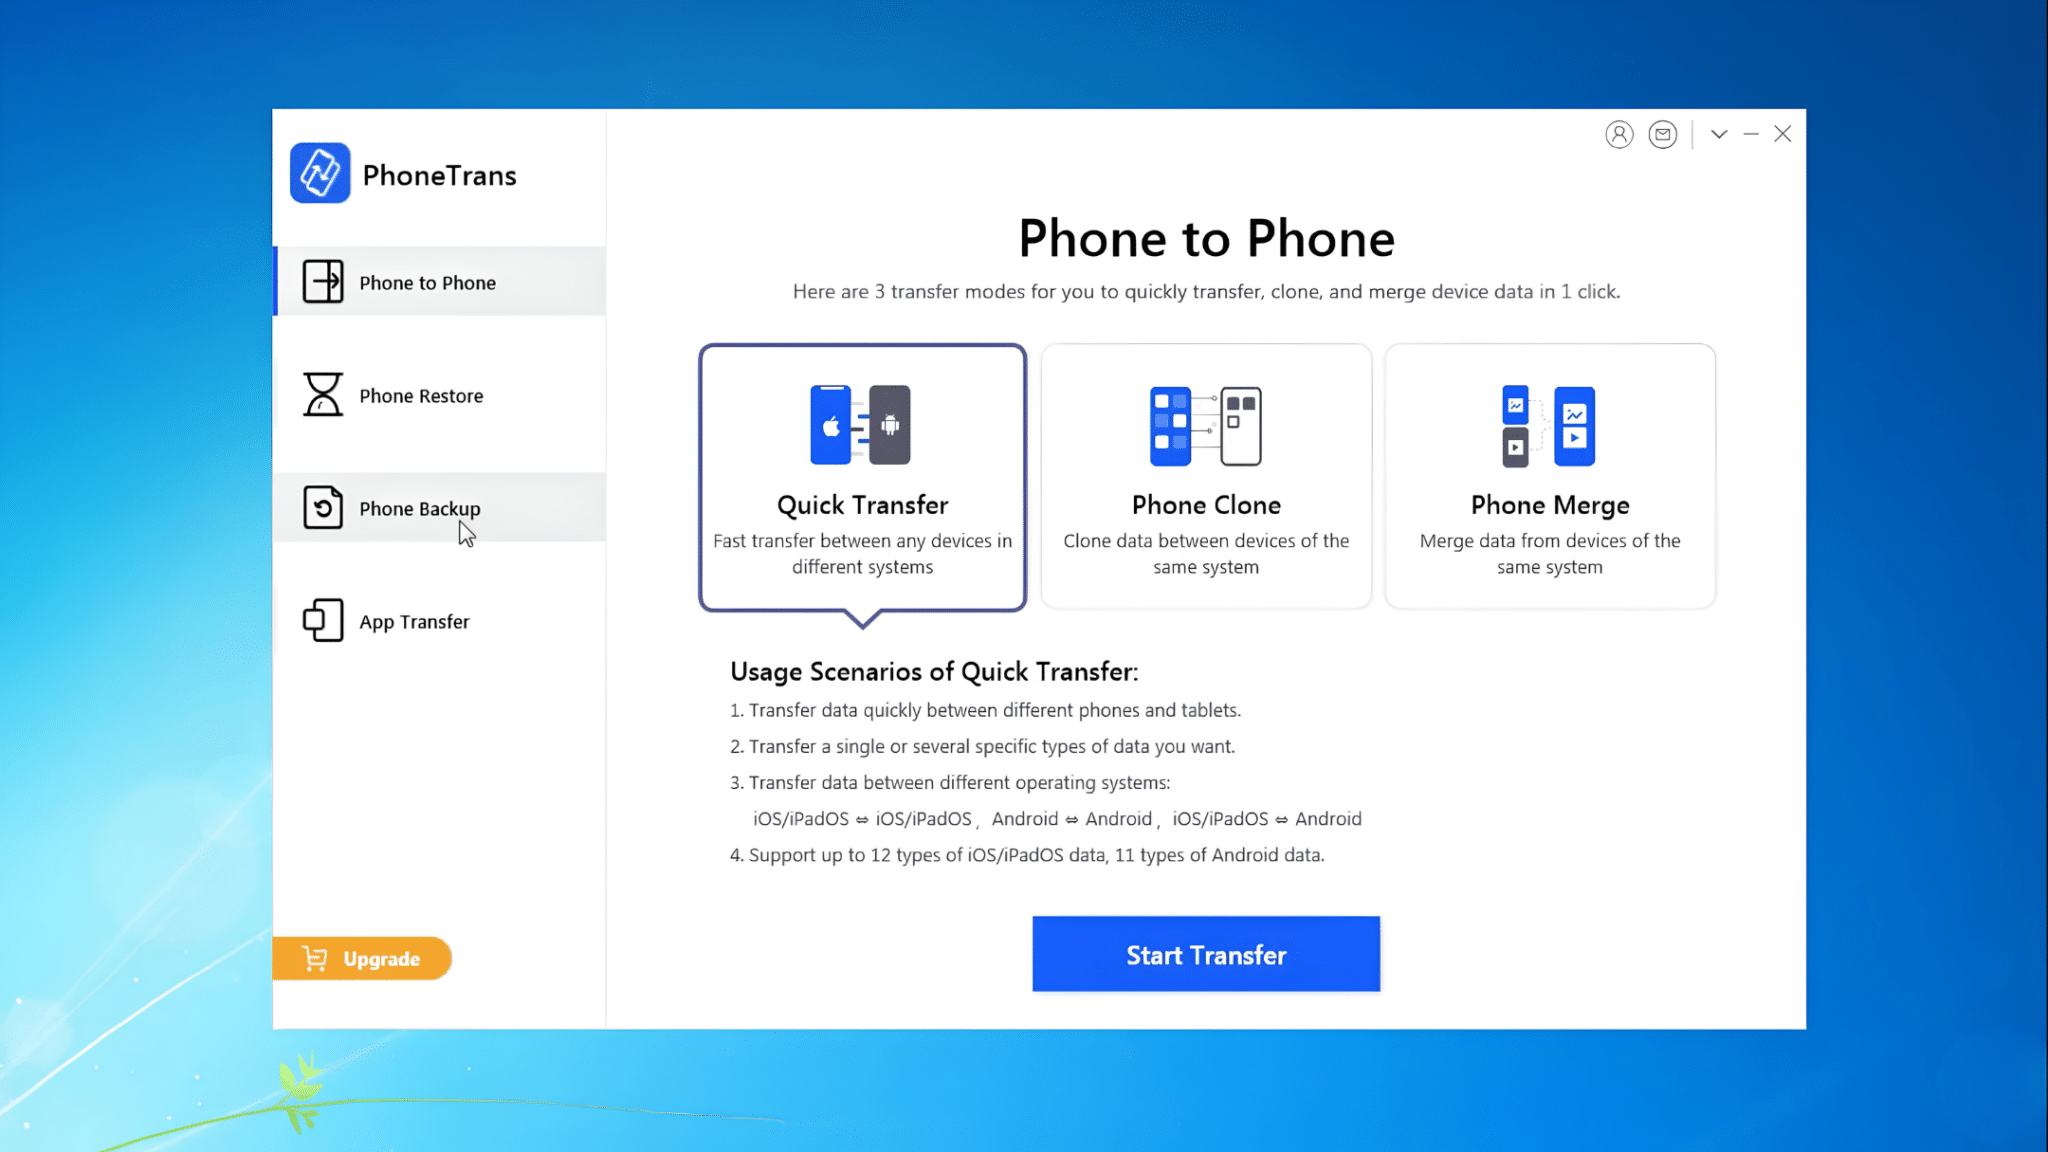
Download and install PhoneTrans on your computer. Once the installation is complete, launch the software and wait for the main dashboard to load.
The dashboard provides access to backup, restore, and device management tools.
Next, connect your Android phone to the computer using a USB cable. After the device is detected, PhoneTrans will display available backup options.
Make sure the connection remains stable throughout the process to prevent interruptions and ensure all selected data can be backed up successfully.
Step 2: Select Phone Backup
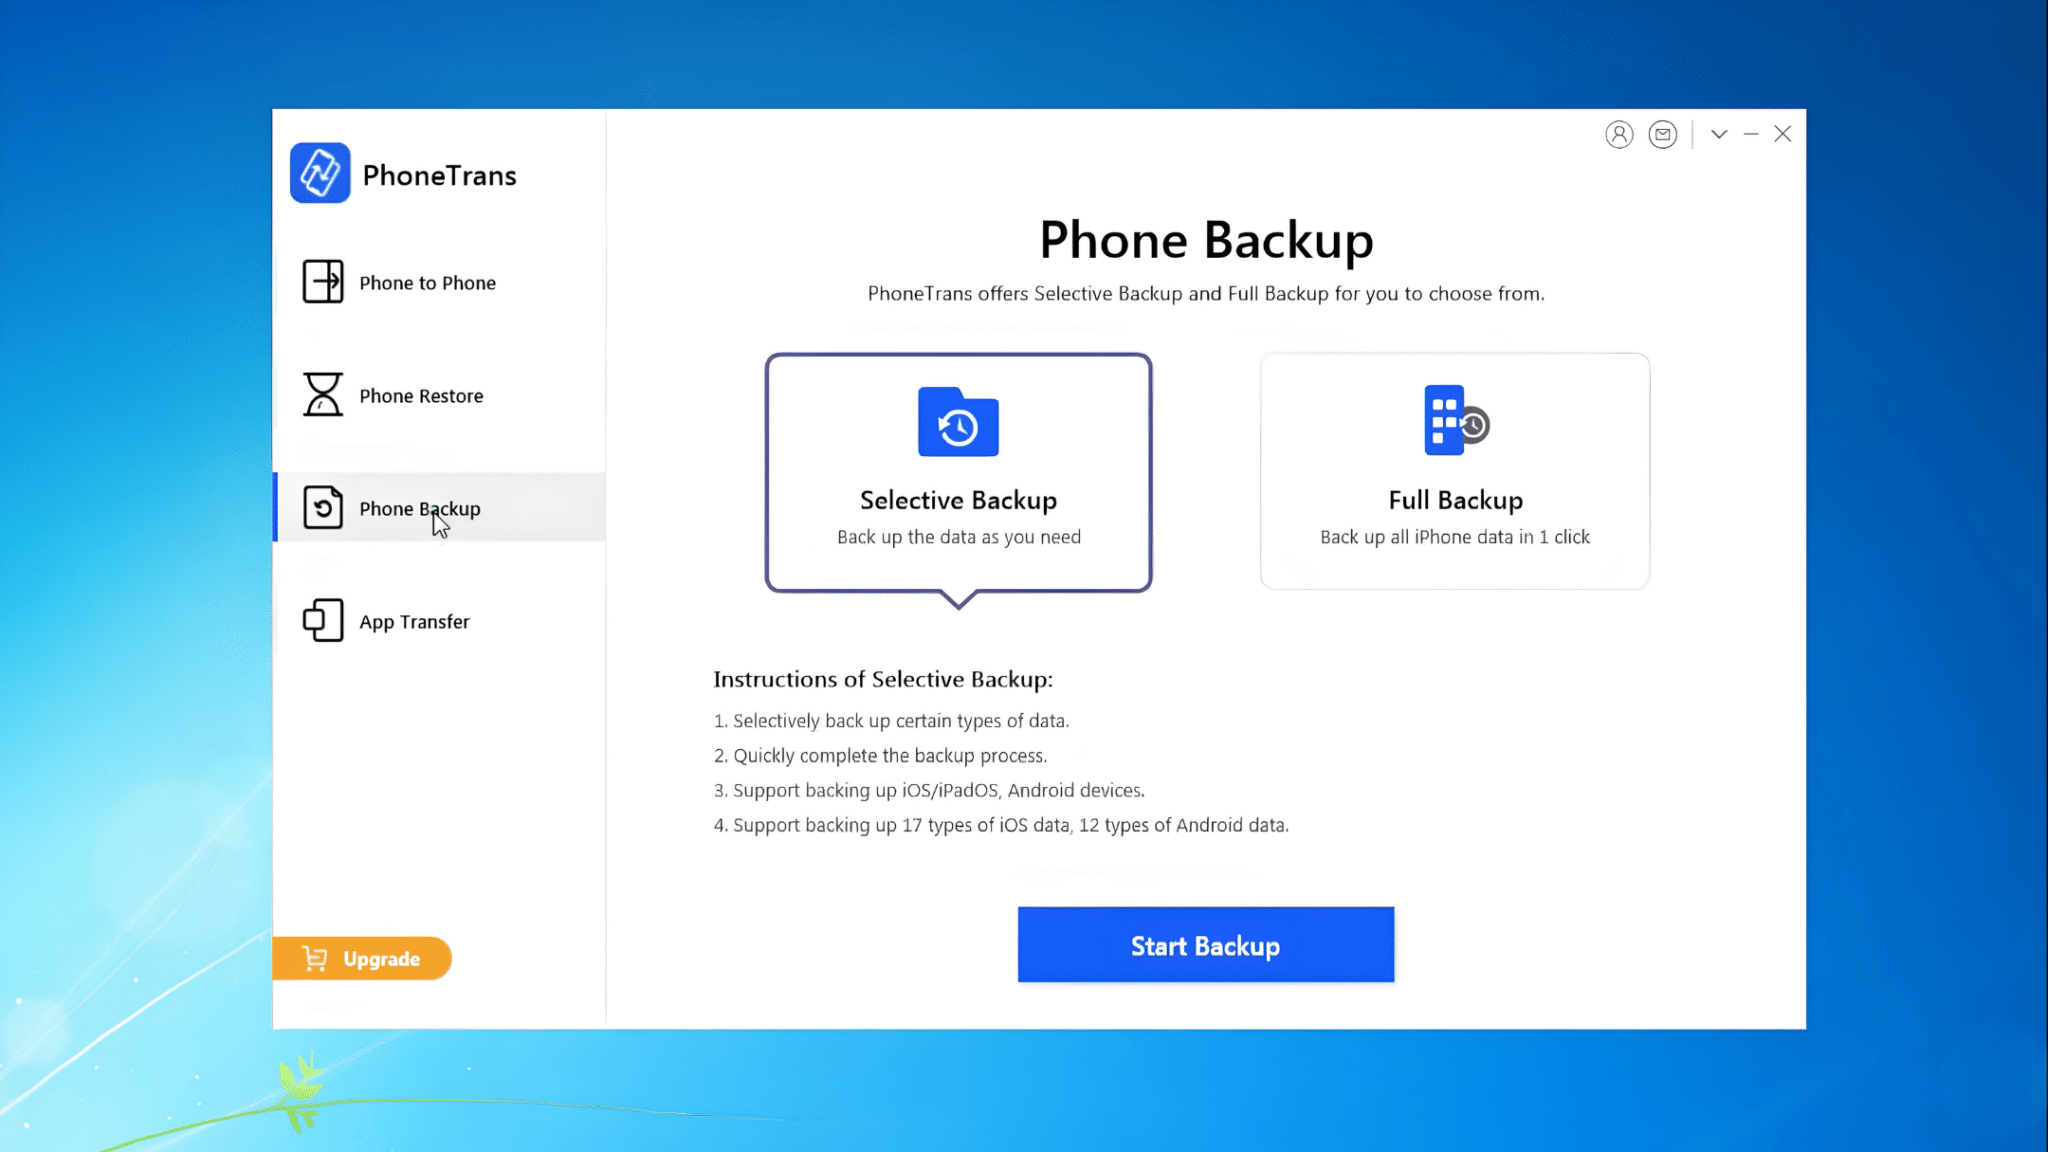
From the main screen, locate and select the Phone Backup option. This section contains tools for creating and managing backups for Android devices.
The backup area allows users to choose different backup methods depending on their needs.
Accessing this section is an important step because it prepares the software to gather and organize data before the backup process begins.
It also provides access to restore options that may be needed later
Step 3: Choose Selective Backup
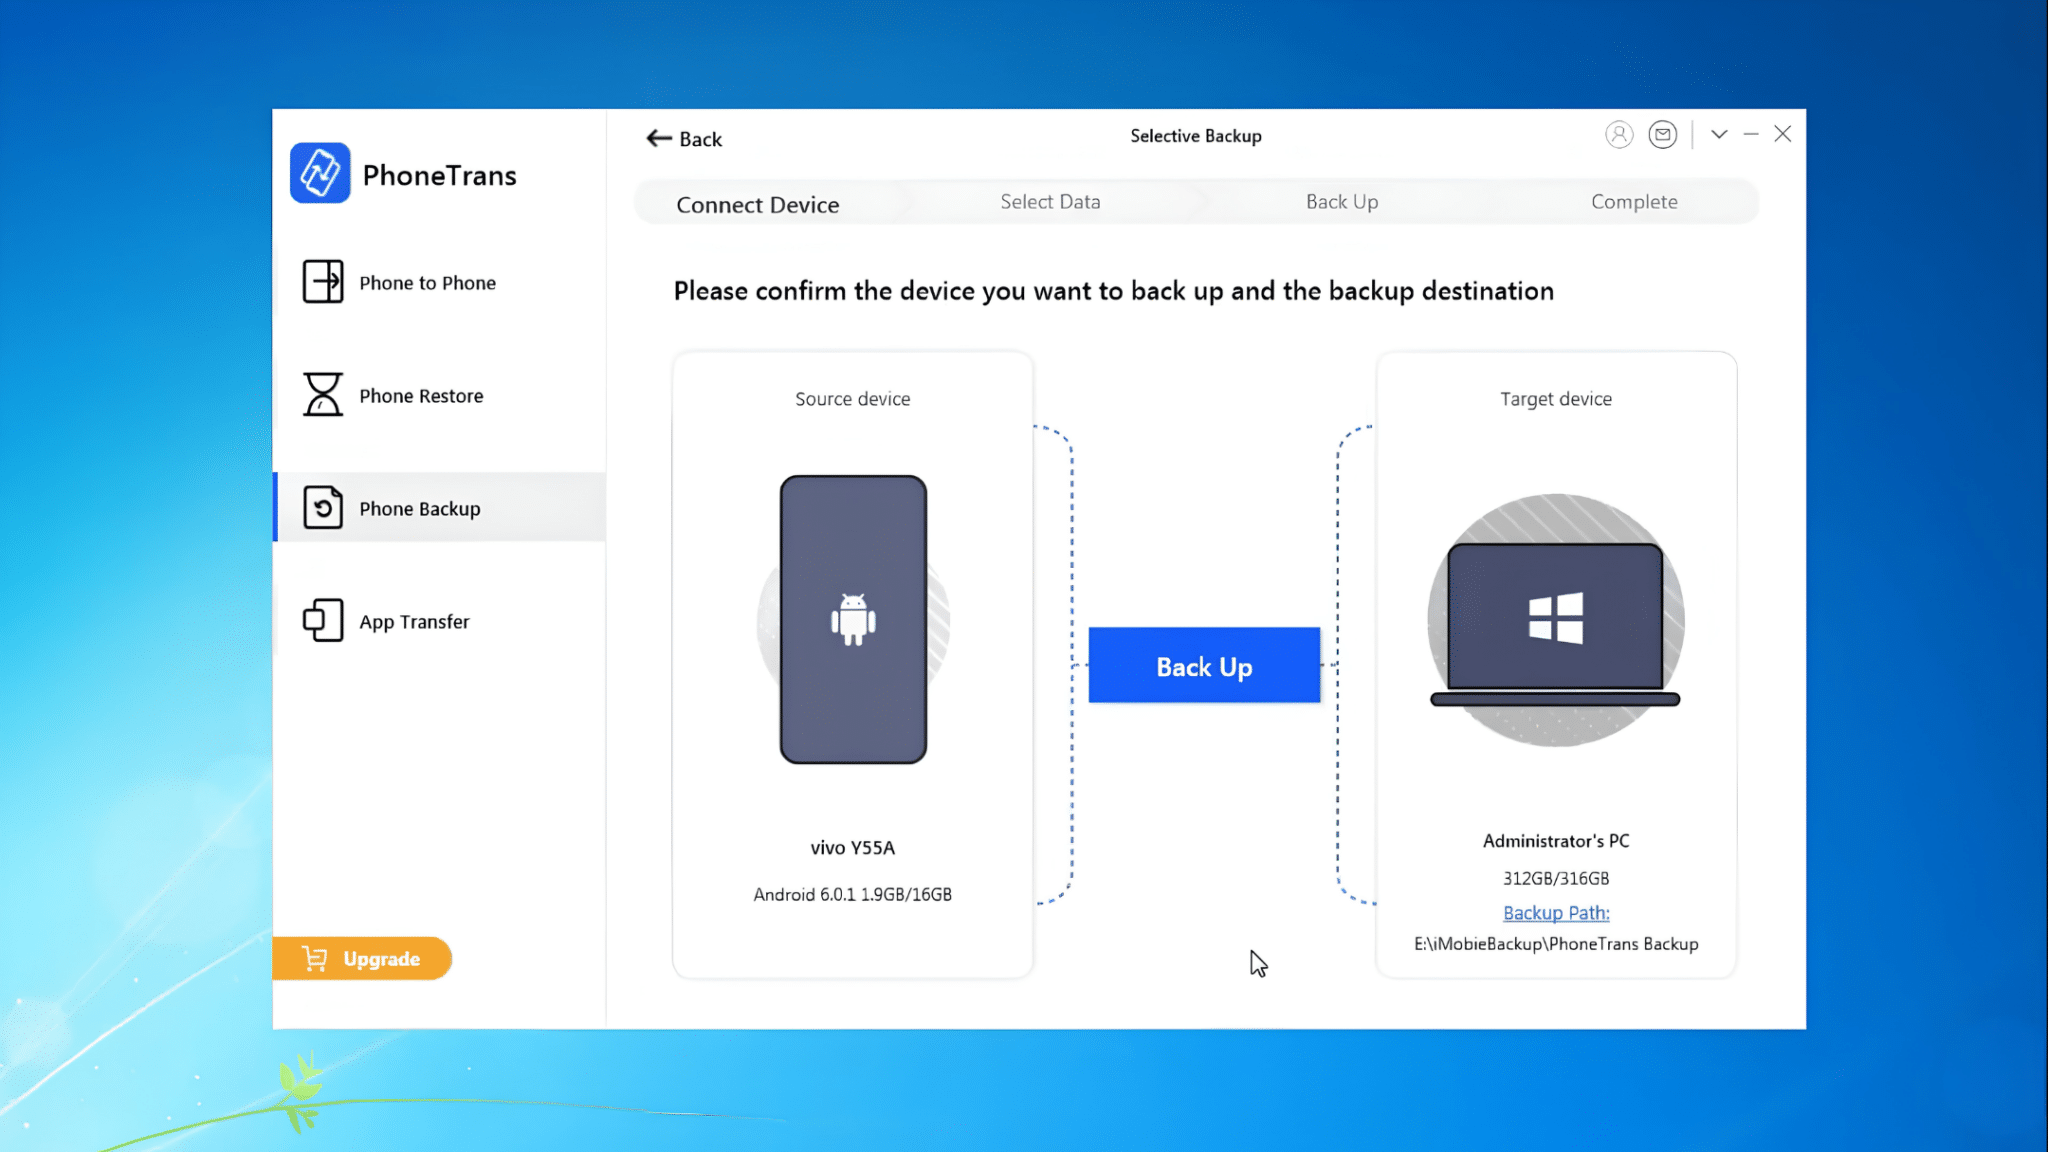
Select Selective Backup and click Start Backup to continue. This option lets you select specific data types rather than creating a full device backup.
A selective backup is useful when only certain information needs to be saved, such as photos, messages, or contacts.
Choosing only the required data can reduce storage usage and shorten backup times. It also makes it easier to locate and restore important files when needed.
Step 4: Select the Data You Want to Back Up
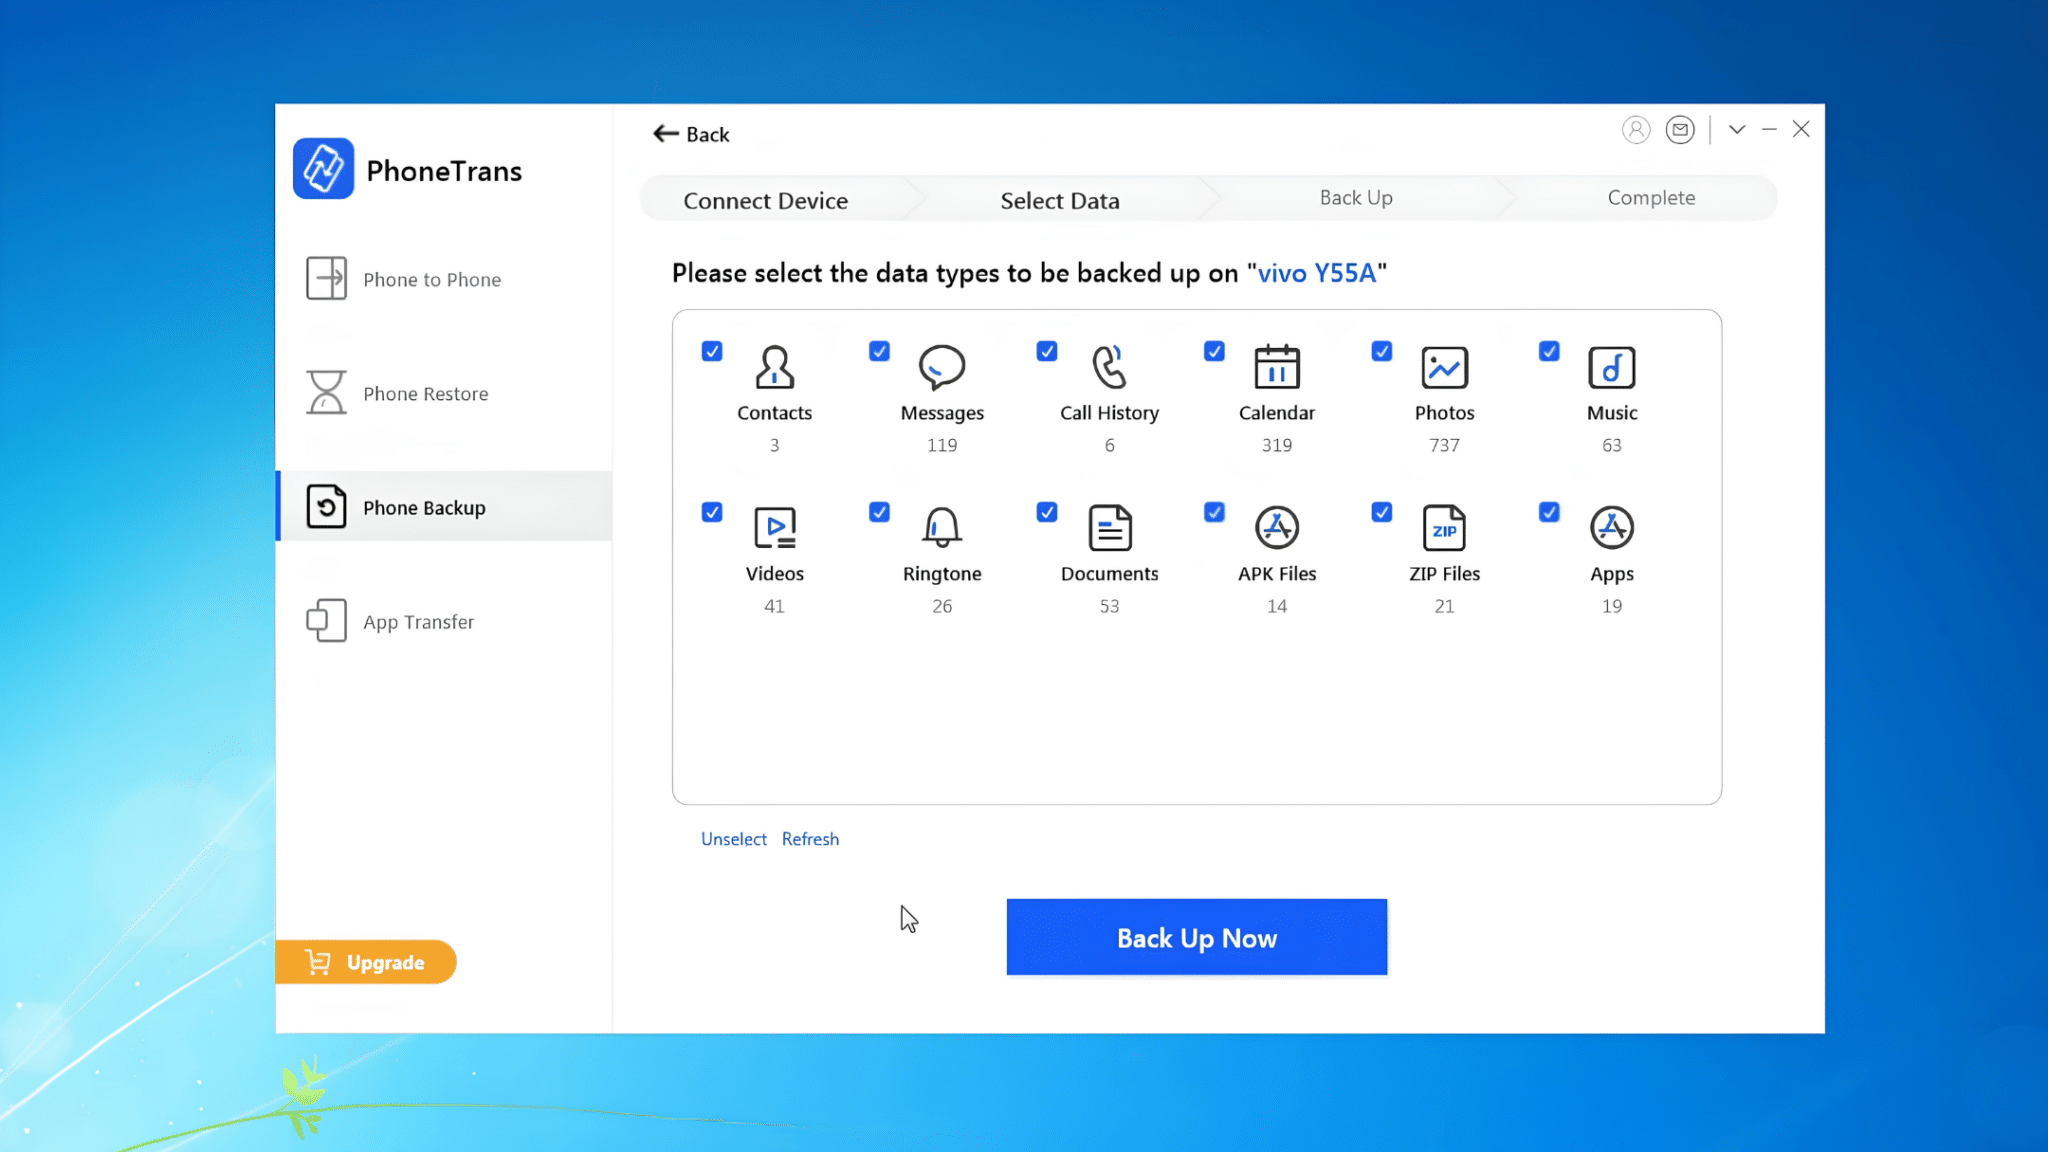
Choose the categories you want to include in the backup.
Depending on the software version, options may include contacts, messages, photos, videos, applications, and other personal data.
Carefully reviewing the available categories can help ensure that important information is not overlooked.
Once the selections are made, PhoneTrans prepares the chosen files for transfer. This step gives greater control over the backup process and allows users to save only the data that matters most.
Step 5: Complete the Backup Process
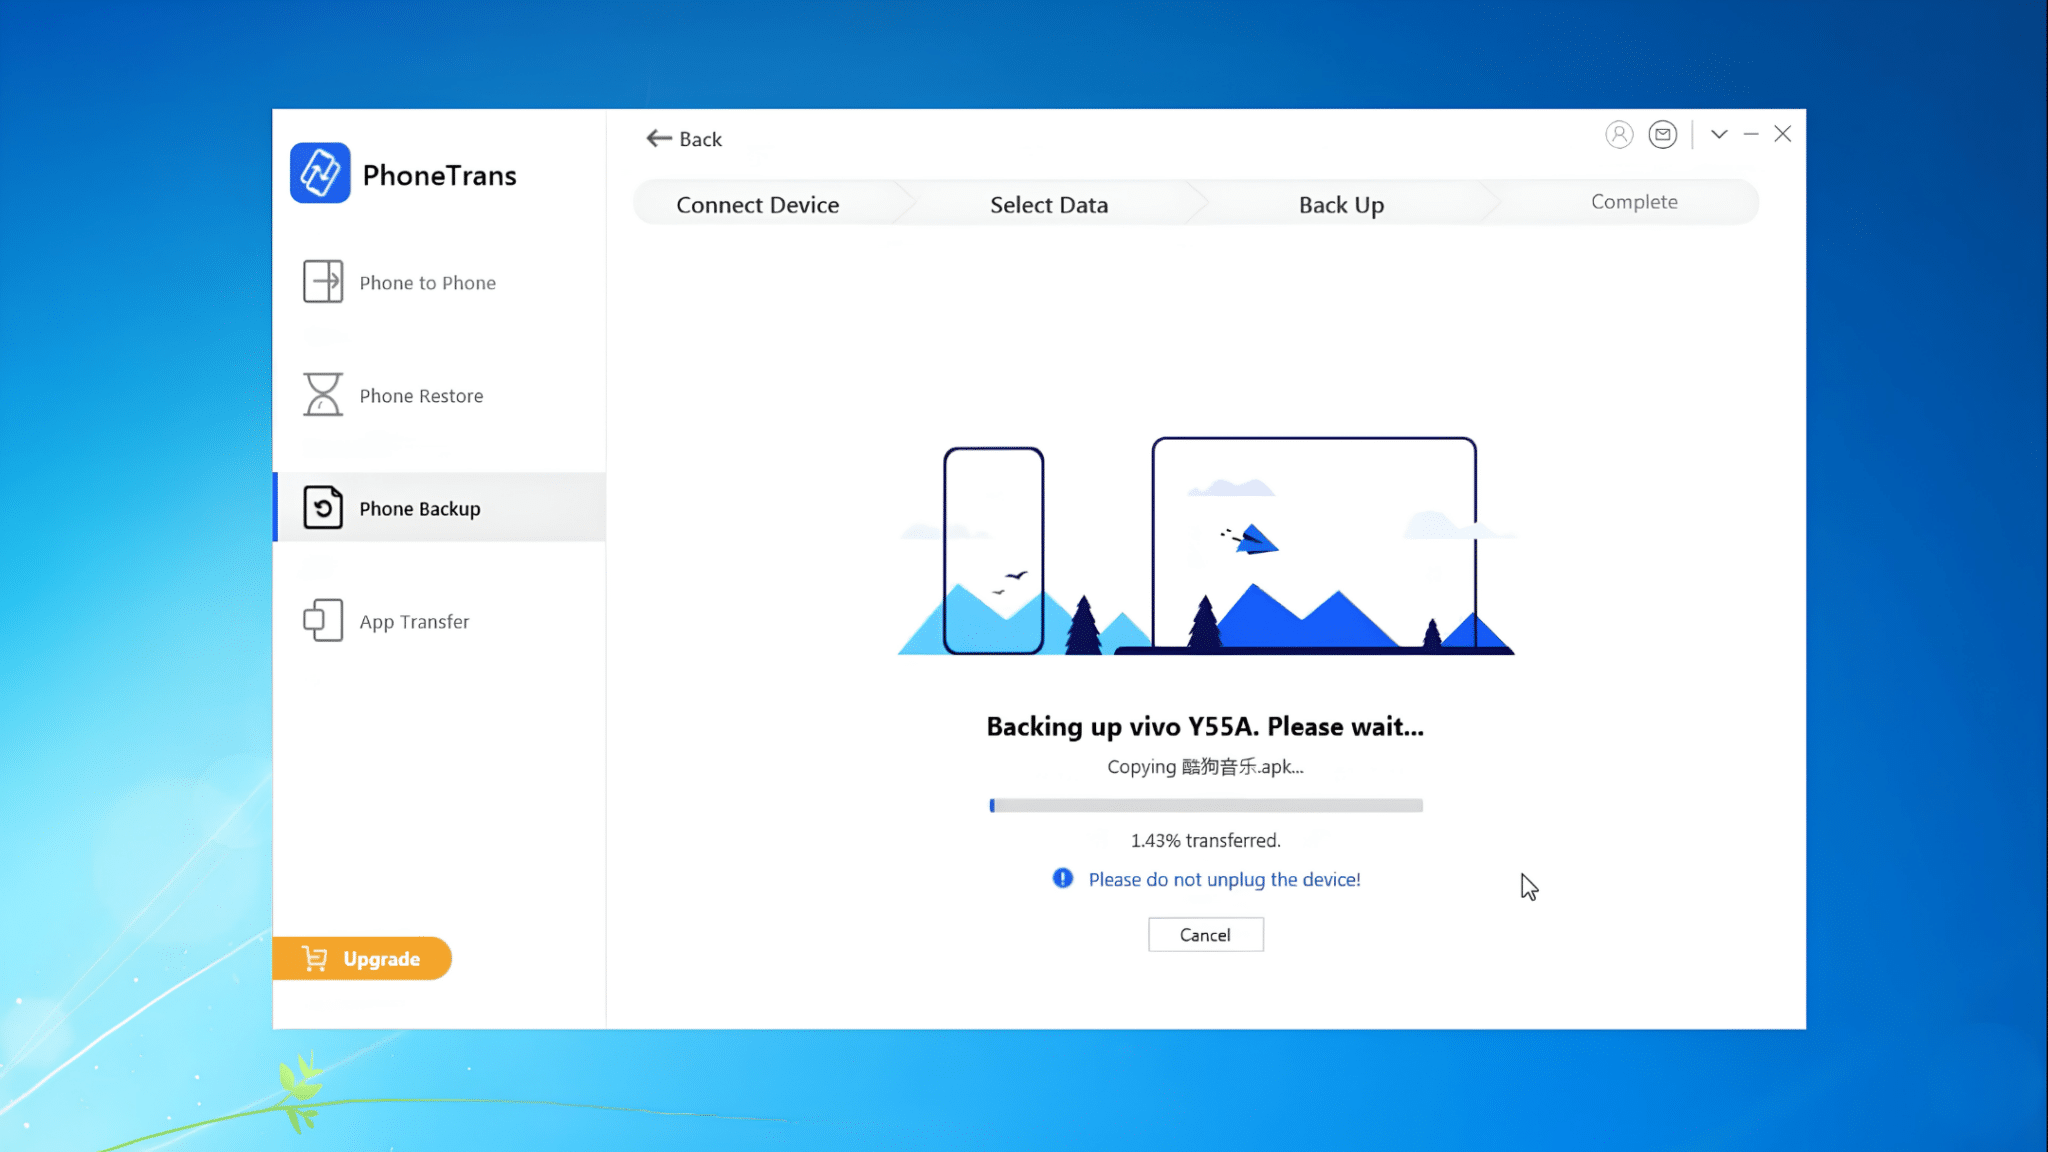
Start the backup and wait for PhoneTrans to copy the selected data to the computer.
The time required will depend on the size of the backup and the amount of data stored on the device.
Once the process is complete, the backup will be stored safely on the computer.
It can later be used to restore data to the same device or transfer information to a replacement phone. Keeping an updated backup can help reduce the risk of data loss.
Method 3: Backup Samsung Phone to PC with Smart Switch
Samsung users can use Smart Switch to back up their device directly to a computer. This method is designed specifically for Samsung phones and supports a wide range of data types.
Step 1: Install Samsung Smart Switch

Download Samsung Smart Switch from Samsung’s official website and install it on your computer.
Once the installation is complete, launch the application and grant any required permissions.
Before connecting your phone, make sure you’re using the latest version of Smart Switch to ensure the best compatibility with your Samsung device and access to the latest features.
Step 2: Connect Your Samsung Phone and Start the Backup
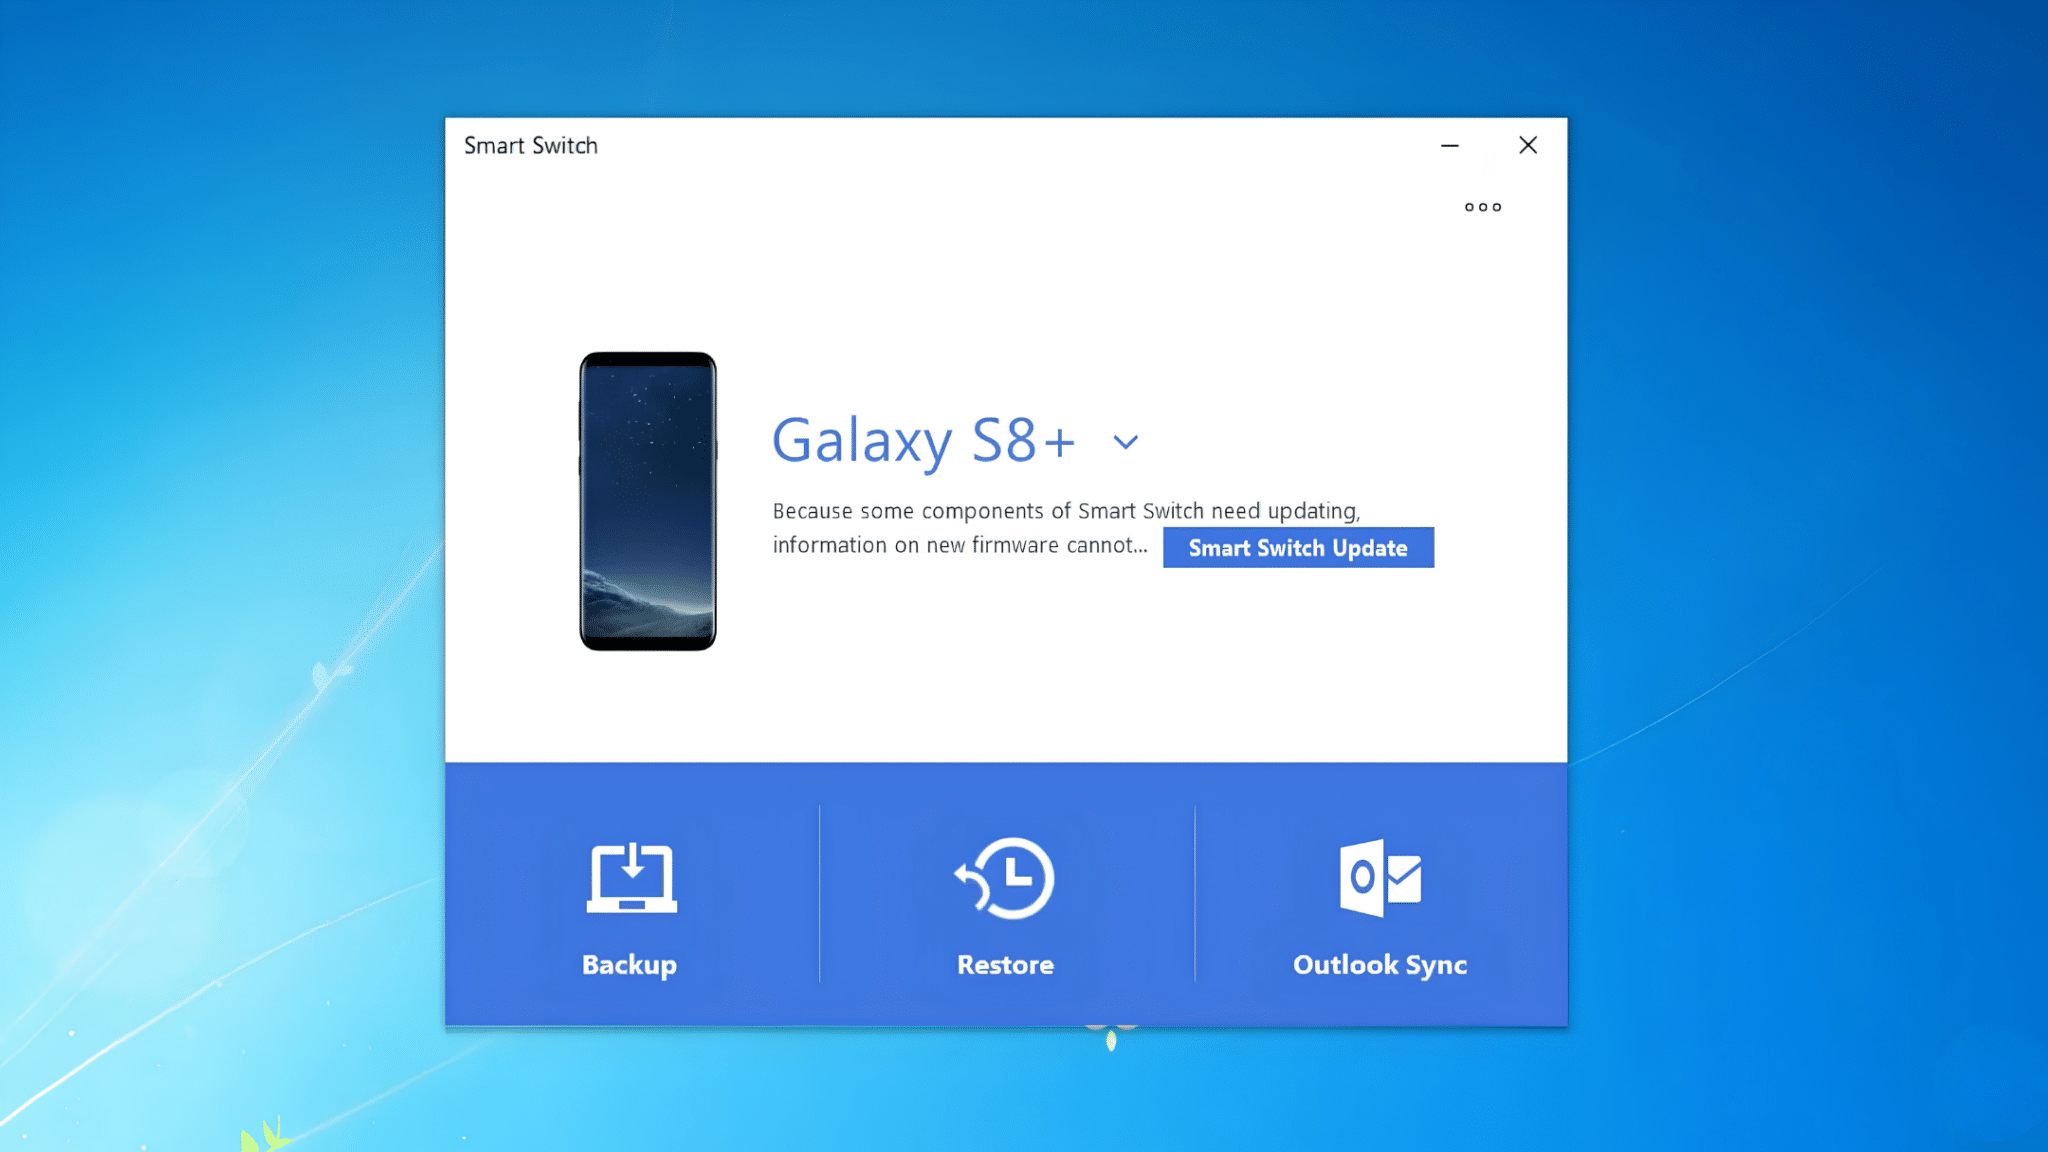
Connect your Samsung phone to your computer using a USB data cable and unlock the device. If prompted, tap Allow to grant USB access.
Once Smart Switch recognizes your phone and displays it on the home screen, click the Backup button.
The software will prepare your device and automatically detect the data available for backup. Keep your phone connected throughout the process to avoid any interruptions.
Step 3: Review Backup Items
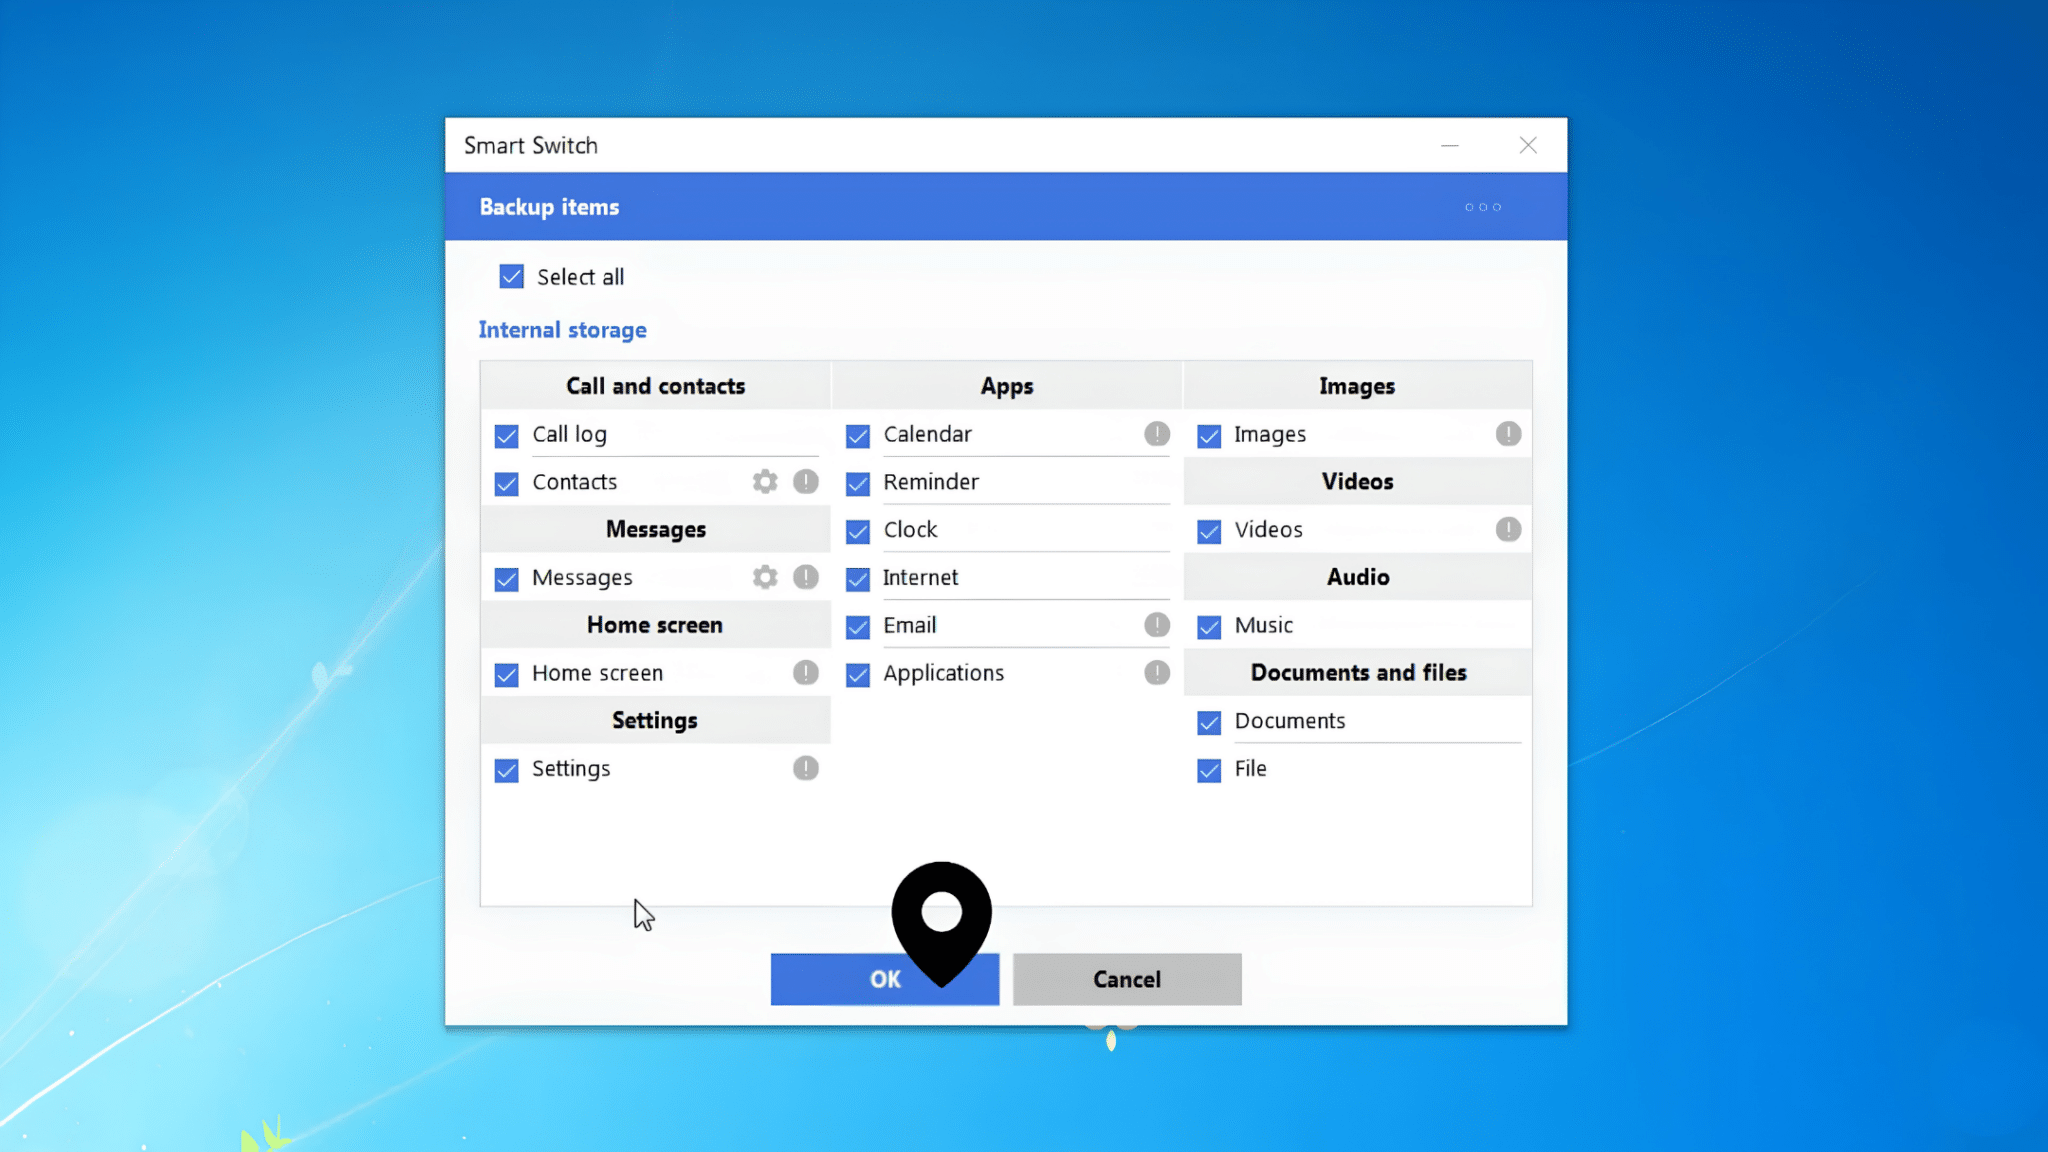
Smart Switch will display the categories of data included in the backup, such as contacts, messages, photos, videos, apps, and settings.
Review the selected items to make sure everything important is included.
If you’re satisfied with the selections, click OK to proceed with the backup process.
Step 4: Start the Backup
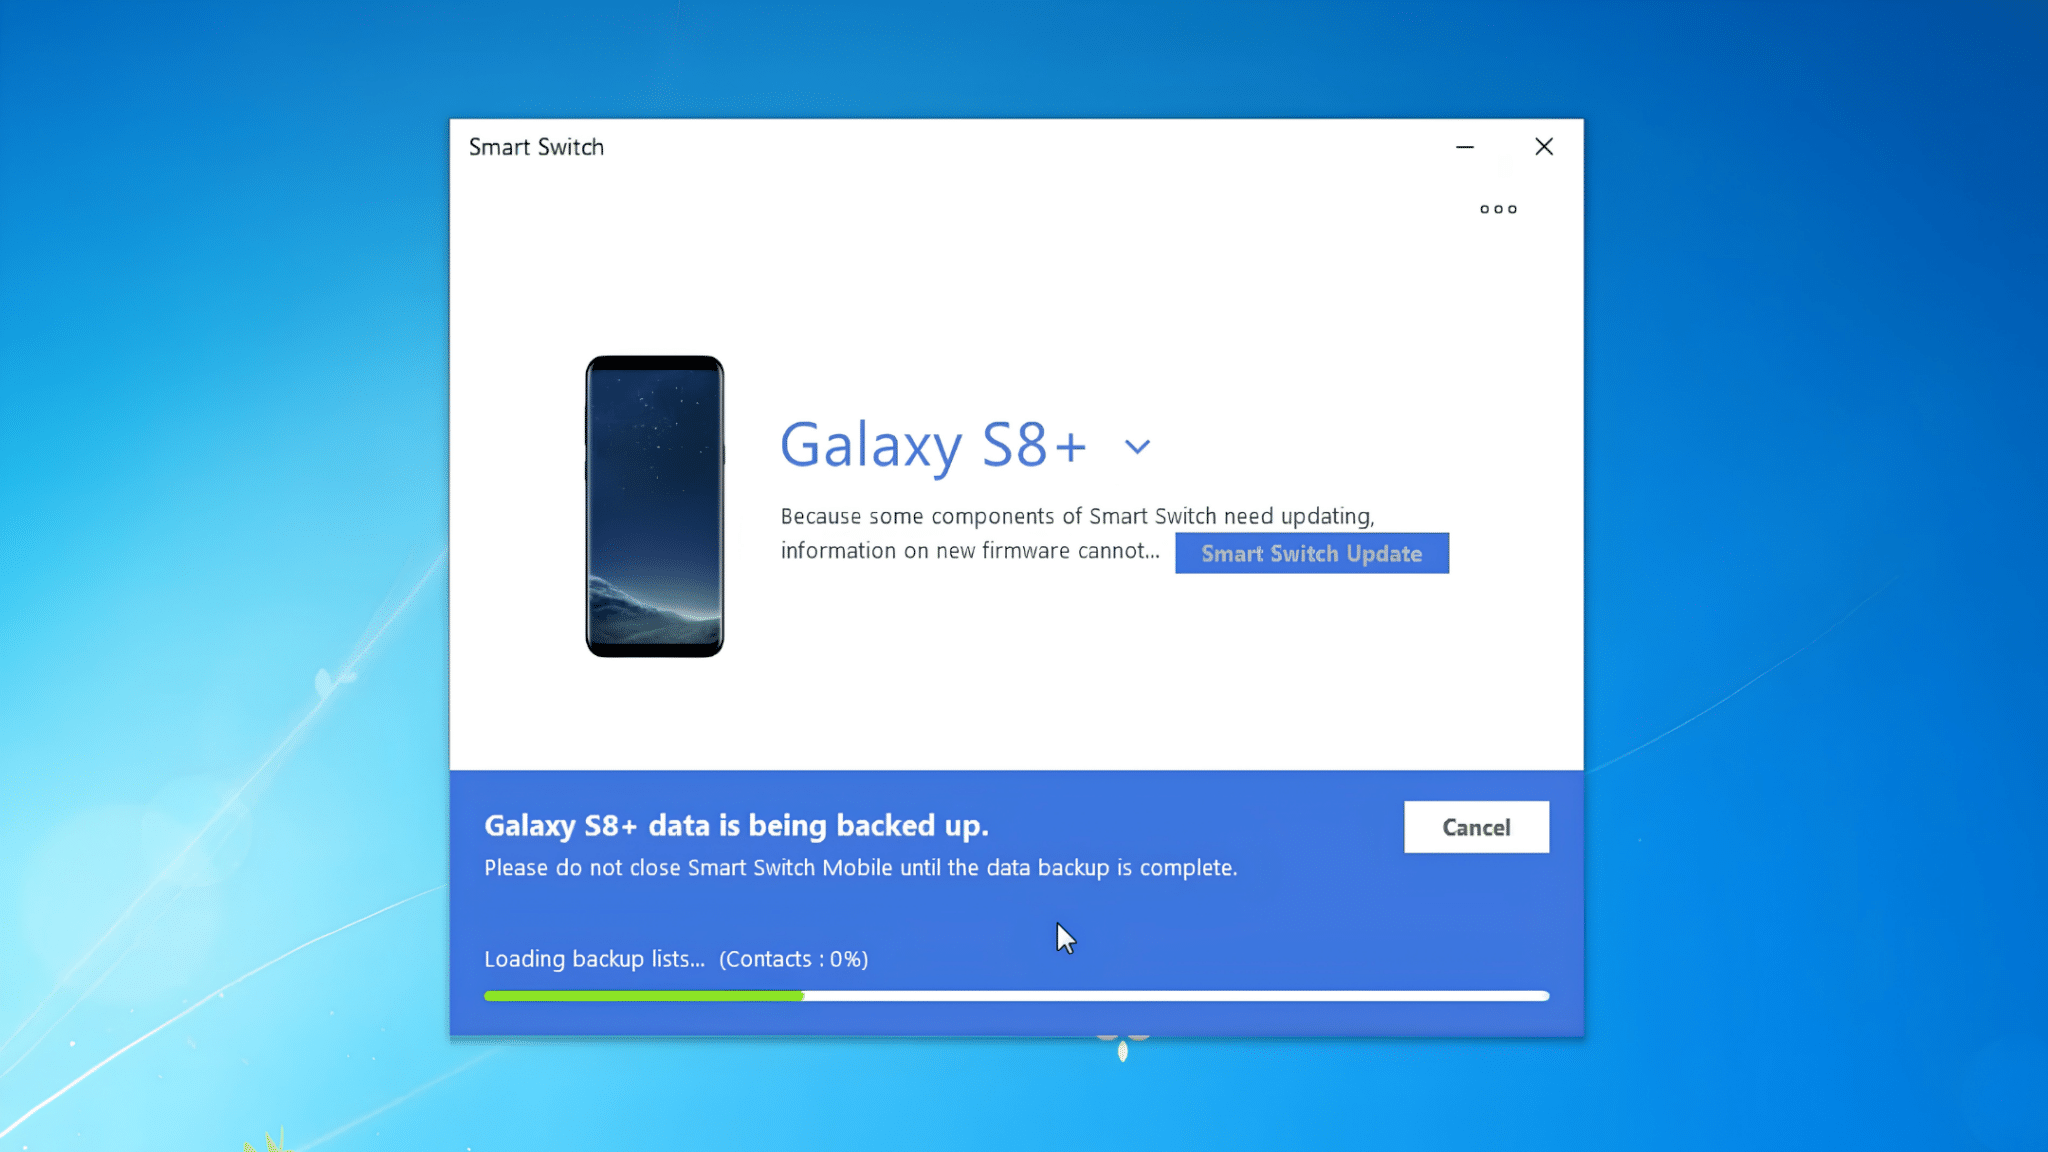
Smart Switch will begin copying your selected data to your computer.
The time required depends on how much data is stored on your phone, so larger backups may take longer.
Once the process finishes, you’ll see a confirmation message indicating that your Samsung phone has been successfully backed up and your data is safely stored on your computer.
This guide is based on the YouTube video “[3 Ways] How To Backup Android Phone To PC (Samsung Supported!) 2023” by iMobie and has been converted into a step-by-step written tutorial for easier reference.
Manual Backup vs Software Backup
Both methods can help protect important data, but they serve different needs. The best option depends on the type of data being protected and the level of convenience required.
| Feature | Manual Backup | Backup Software |
| Setup Process | Connect the phone and copy files manually | Install the software and follow the guided steps |
| Data Types Supported | Photos, videos, music, and documents | Photos, contacts, messages, apps, settings, and more |
| Ease of Use | Simple but requires manual file selection | More automated and user-friendly |
| Backup Speed | Depends on the file size and the transfer method | Often optimized for faster backups |
| Restore Capability | Limited restore options | Usually includes built-in restore tools |
| Storage Management | Files must be organized manually | Backups are managed automatically |
| Cost | Typically free | Some tools may require a subscription or a license |
| Best For | Users who only need to save specific files | Users who want a more complete device backup |
When Should You Back up an Android Phone?
Backing up your Android phone at the right time helps prevent data loss and makes it easier to recover your important files.
- Before a factory reset: Create a complete backup to avoid permanently losing your photos, contacts, messages, apps, documents, and other important personal data.
- When switching to a new phone: Back up your current device so you can transfer all your important files, settings, and media to the new phone more easily.
- Prior to a major Android update: Save a recent backup in case the update fails, causes unexpected issues, or requires you to restore your device.
- Before sending your phone for repair: Protect your personal data in case the repair process requires a factory reset or replacement of your device.
- After adding important photos or files: Regularly save your latest pictures, videos, work documents, and downloads so you always have an up-to-date backup.
- If your phone starts showing problems: Back up your data immediately if your device begins freezing, crashing, restarting randomly, or showing signs of hardware failure.
- As part of a regular routine: Create a backup every few weeks or at least once a month to ensure your latest data is always protected and easy to recover.
Which Backup Method Should You Choose?
The best backup method depends on the type of Android device you use and the amount of data you want to save.
| Method | Best For | Advantages | Limitations |
| Manual Backup via USB | Photos, videos, and documents | Free and easy to use | Does not back up all data types |
| PhoneTrans | Full device backups | Supports multiple data types and restoration | Requires additional software |
| Samsung Smart Switch | Samsung devices | Designed specifically for Samsung phones | Only works with Samsung devices |
If you only need to save personal files, a manual backup may be enough. For a more complete backup that includes additional data, PhoneTrans can be a better choice.
Common Android Backup Problems and Fixes
Even a simple Android backup can run into issues, especially if there are connection or storage problems.
- Phone not detected by the PC: Unlock your phone, select File Transfer (MTP) mode, and try a different USB cable or USB port.
- Backup is taking too long: Keep your phone connected, close unnecessary apps, and wait if you’re backing up a large amount of data.
- Not enough storage on the PC: Free up disk space or choose a different drive before starting the backup.
- USB connection keeps disconnecting: Use the original or a certified data cable, and avoid loose or damaged USB ports.
- Backup software won’t recognize your device: Restart both your phone and computer, then update the backup software to the latest version.
- Some files are missing after the backup: Check that you selected all the required folders or data categories before starting the backup.
- App data or text messages weren’t backed up: Use dedicated backup software like PhoneTrans or Samsung Smart Switch, as USB file transfers only copy media and documents.
- Google Backup didn’t restore everything: Make sure you’re signed in with the same Google account, and that backup was enabled before resetting your device.
Conclusion
Knowing how to back up an Android phone to a PC can help protect your important files and make it easier to recover data if your device is lost, damaged, or replaced.
Whether you choose a manual backup, PhoneTrans, or Samsung Smart Switch, each method offers a reliable way to back up your data to a computer.
Manual backups help transfer files, while PhoneTrans and Smart Switch offer fuller backup options.
Choosing the right method depends on your device, the type of data you want to save, and your backup preferences.
Regular backups can help prevent data loss and give you peace of mind. Try one of these methods today to keep your Android data safe and easily accessible.
Frequently Asked Questions
Where Are Android Backups Stored on a PC?
Android backups are typically stored in the folder selected during the backup process. Backup software may also save files in a default storage location specified by the application.
Can an Android Phone Be Backed up Wirelessly?
Yes. Some backup applications support wireless backups over Wi-Fi, allowing data to be transferred without using a USB cable.
How Often Should an Android Phone Be Backed Up?
Regular backups help reduce the risk of data loss. Backups are commonly performed monthly or before major software updates, repairs, or device replacements.
Will Backing up an Android Phone Delete Any Data?
No. Creating a backup copy of data to another location without removing files, photos, settings, or other information from the device.